Customize Gadget |
  
|
Customize Gadget |
|
Gadgets can be customized when applied in Page Editor by changing properties and adding Events related to the UI Parts inside the Gadget.
Gadget UI Parts:
TextField
RoundButton
Gadget Action:
Set Text in the TextField On clicking on RoundButton.
Customization
TextField:
Properties:
1. Border Color
2. Font Size
3. Text Color
RoundButton:
Properties:
1. Title/Display Text
Event:
On tap
To Create a Custom Gadget , Create a Project. Open your Project and follow the steps as given below.
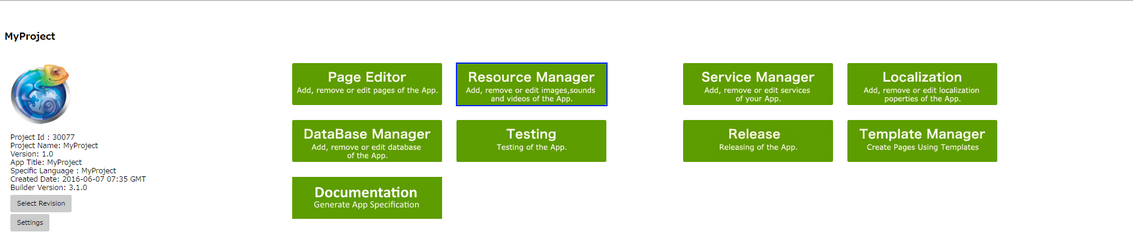
Step1: Click on Resource Manager on the Application Manager Page as shown below.
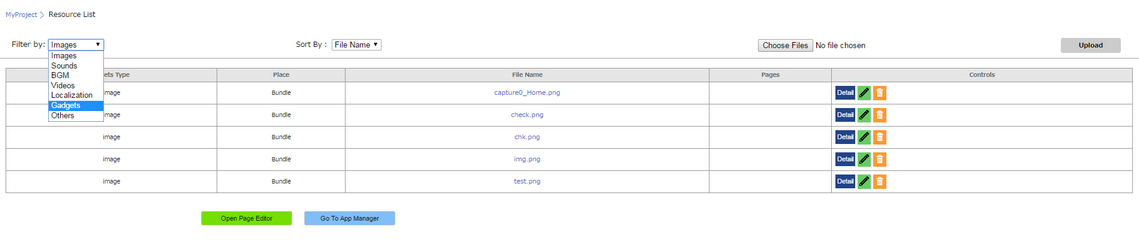
Step2: Resource Manager Page Opens. Select "Gadgets" from "Filter by" options.
Step3: Click on "Add Gadget" to create a new Gadget.

Step4: Following Pop up opens to create a Gadget. Enter the parameters as shown below and click "Create".
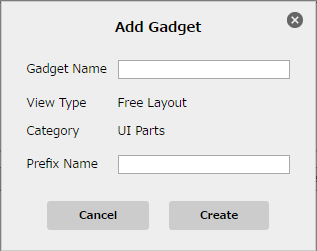
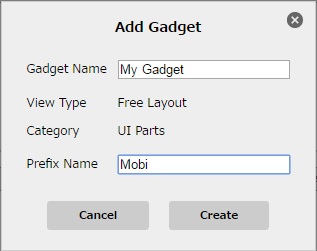
Parameter |
Description |
Gadget Name |
Enter the name of the Gadget. |
View Type |
View Type is the type of the page used in Gadget i.e FreeLayout. |
Category |
Category of the Gadget is UI Parts as Gadget is used as a UI Part in Page Editor. |
Prefix Name |
Enter the Prefix name for the Gadget which is used for reference in Page Editor. |
Step5: Gadget is listed as shown below. Click on "Gadget Editor".

Step6: Gadget Editor window opens as shown below.

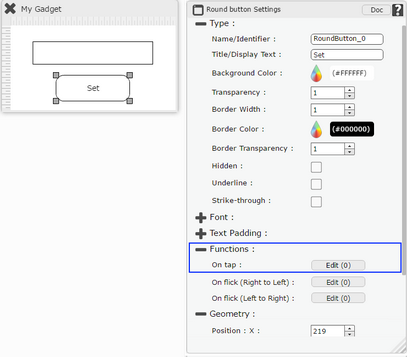
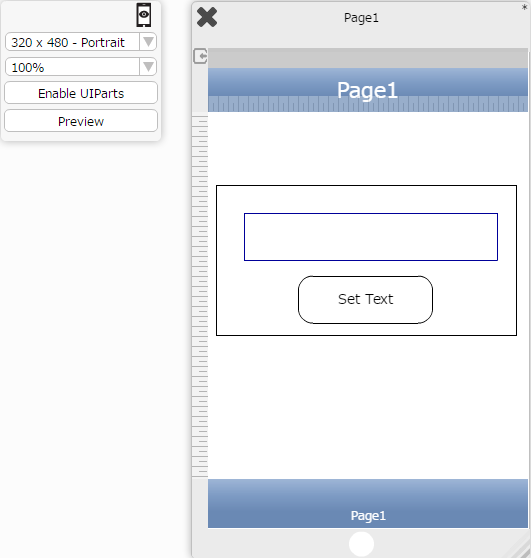
Step7: Drag and Drop UI parts to the Gadget Page for e.g TextField and RoundButton.
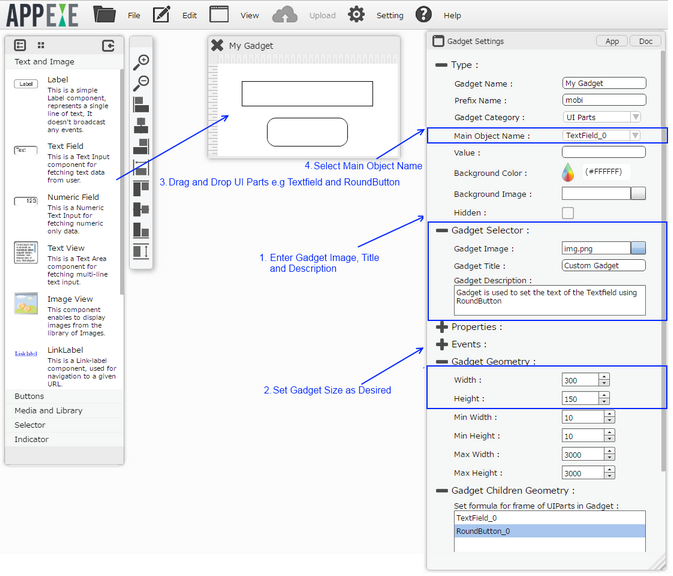
Step8: Set properties of the UI Parts.
Note: No action is applied here in Gadget as shown below.
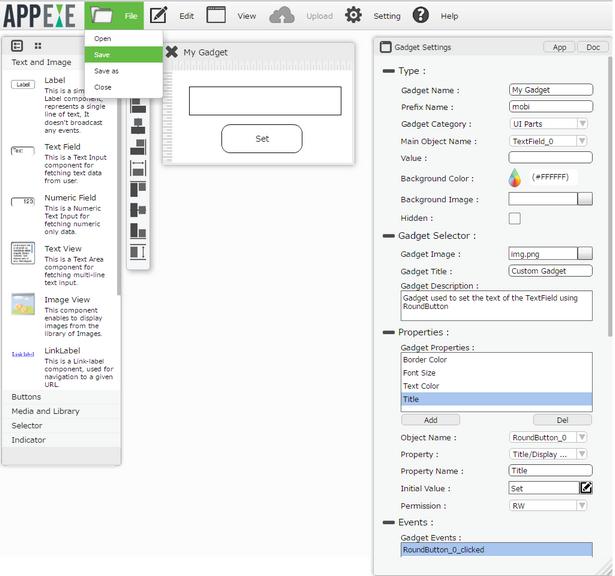
Step9: In the Gadget Settings Palatte, set the Properties and Events which can be customized in the Page Editor.

Properties
Parameter |
Description |
Object Name |
Select the UI Part whose property has to be Customized. e.g 1. TextField 2. RoundButton |
Property |
Select the property of the UI Part to be customized. e.g Property of TextField: 1. Border Color 2. Font Size 3. Text Color Property of RoundButton: 1.Title |
Property Name |
User can give a name to the property selected for reference in Page Editor. |
Initial Value |
User can set the initial value for the property. |
Permission |
User can set Permission as "RW" which allows user to edit the Property in the Page Editor. "RO" which does not allow user to edit the Property in the Page Editor. |
Events
Parameter |
Description |
Object Name |
Select the UI Part whose Event has to be customized. e.g "RoundButton" |
Object Event |
Select the Event to be Customized.e.g "On tap" |
Event Name |
Event Name is displayed here for reference in Page Editor. |
Step10: Save the Gadget by clicking on File Menu and Save option.
Step11: Resource Page opens. Gadget is created. Click on "Open Page Editor" to open Page Editor.

Step12: Page Editor Opens. Drag and Drop the Gadget to the Page.
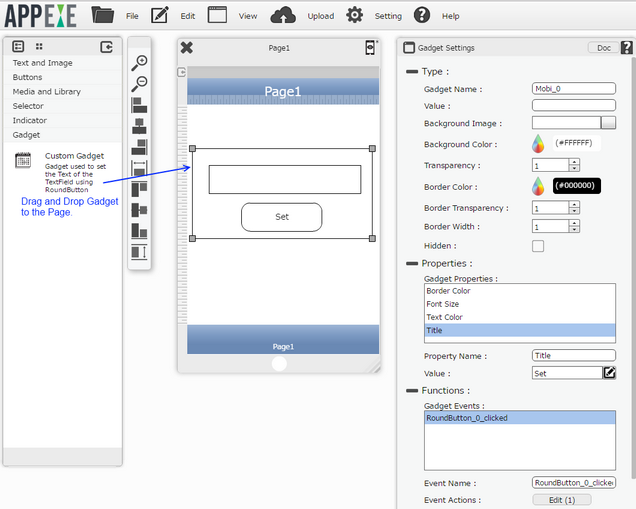
Step13: Customize the Properties and Events as below:
Properties:
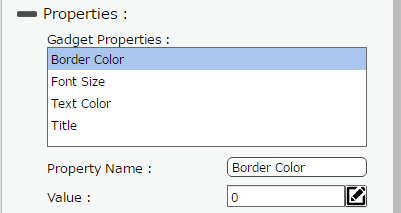
1. Border Color
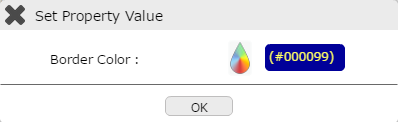
Select the Property and Click on Edit Icon corresponding to "Value" in the first image below. Select Border Color and Click "OK" in the second Image below.
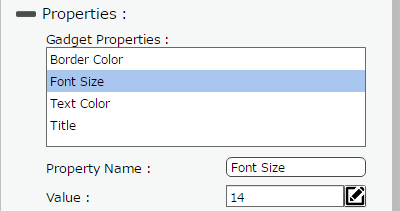
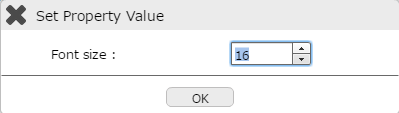
2. Font Size
Select the Property and Click on Edit Icon corresponding to "Value" in the first image below. Select Font Size and Click "OK" in the second Image below.
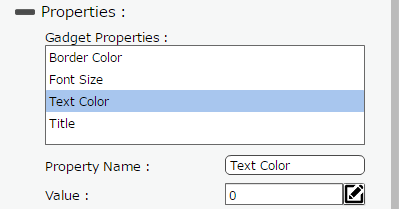
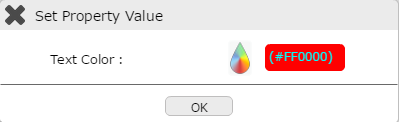
3. Text Color
Select the Property and Click on Edit Icon corresponding to "Value" in the first image below. Select Text Color and Click "OK" in the second Image below.
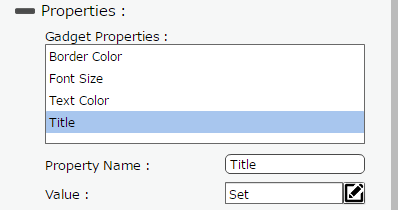
4. Title
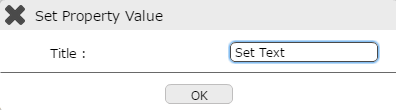
Select the Property and Click on Edit Icon corresponding to "Value" in the first image below. Set Title and Click "OK" in the second Image below.
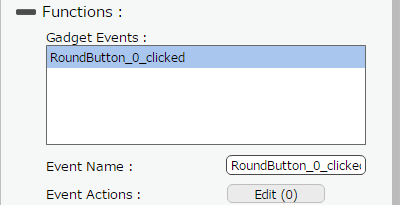
Events
Select the Event and Click on Edit(0) corresponding to Event Actions.
Click on "Add" button to add action. Select "Property Control" Category and "Set Value" Action.
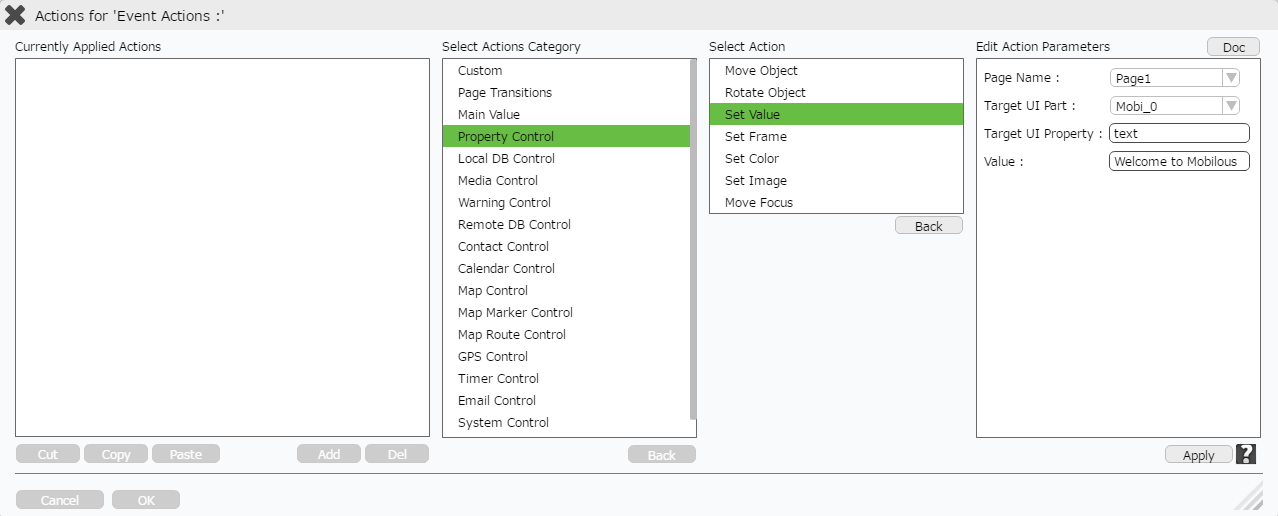
Parameter |
Description |
Page Name |
Set the Page Name on which UI part is present e.g "Page1". |
Target UI Part |
Select the UI Part whose value needs to be set e.g "Mobi_0". |
Target UI Property |
Enter the key for the UI part where key is any common property of the UI Part.To know more about the keys Click Here. e.g "text". |
Value |
Set the value for the key as shown in image. e.g "Welcome to Mobilous". |
Step14: Click on Preview Button on the right top corner and then Click on "Preview" option to preview the Page.
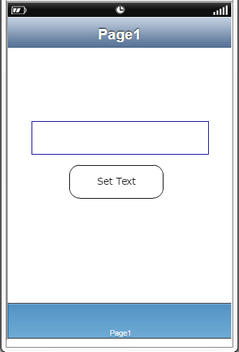
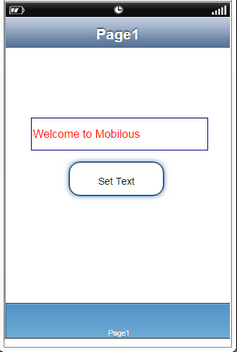
Step15: In the Output , click on "Set Text" Button as shown in first image. The text "Welcome to Mobilous" appears in the TextField as shown in second Image.