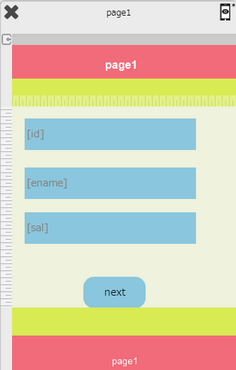
The Applications page will allow the user to create/edit a new project.
Step 1: User need to tap on the "Application" tab which will direct the user to "Project Manager Page".
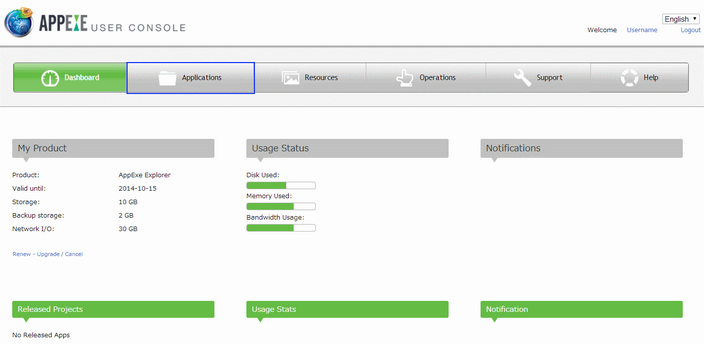
Step 2: The Project Manager page opens as shown in the below image. It displays the total number of existing and released Apps.
![]()
Click to know more about the New/Edit Project.
Display By:
The Display By drop down list will allow the user to choose the view type of the page.
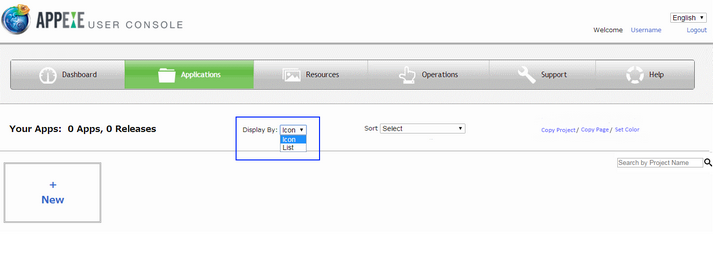
The user has two options to select in the display drop down list.
1. Icon view: It displays the user created applications in an icon form.
![]()
2. List view: It displays the user created applications in a list/table form.

Sort:
The "Sort" drop down list will allow the user to choose from the following features.
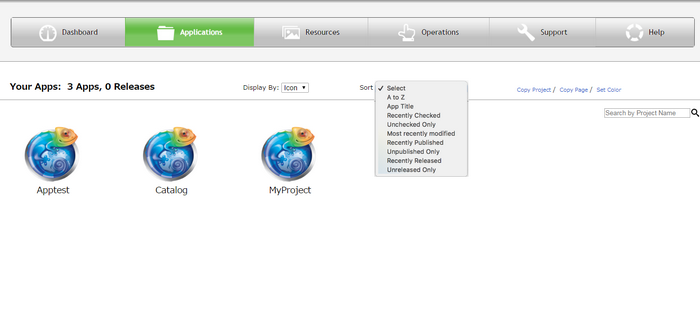
The functionality of these features are mentioned in the below table.
Sort By Features |
Functionality |
A-Z |
The applications will be sorted in a alphabetical order starting with A and ends with Z. |
App Title |
The applications will be sorted with respect to the App Title. |
Recently checked |
The applications will appear in a Recently checked order that is the Recently checked apps will appear in the list. |
Unchecked only |
All the application will be sorted in an unchecked order, Unchecked order is some thing like those apps which user never unchecked will appear in the list. |
Most recently Modified |
The applications will appear in a most recently modified order that is the most recently modified apps will appear in the list. |
Recently Published |
The application will be sorted in a recently published order, i.e. the most recently published app will appear in the list. |
Unpublished only |
The application will be sorted in an unpublished order that is the unpublished app will be appearing only in the list. |
Recently released |
The applications will be sorted in an order that recently released apps will appear in the the list. |
Unreleased only |
The applications will be sorted in an unreleased order that unreleased apps will appear in the list. |
For e.g if "A to Z" is selected, the projects are displayed in Alphabetical order as shown below.
Copy Project:
There is an option for the user to copy a project in the same user account with different name and version.The user needs to follow the below mentioned steps to copy a project.
Step 1: Click on "Copy Project" link.

Step 2: Copy Project window opens as shown below. Enter details as shown in below table and Click on "Submit".
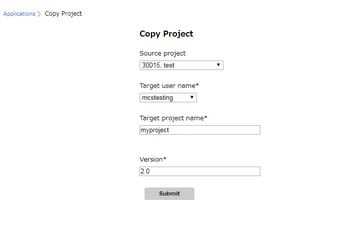
Parameter |
Description |
Source Project |
Select the source project from where project has to be copied. |
Target User name |
Select Target User name for copying the project. |
Target Project name |
Enter the Project name for the new project. |
Version |
Enter the version.This version will be different to the version of the source project. The version can be used to select respective project later, Click here to know more. |
Step 3: Copied project appears as shown in the image below.

Copy Page:
The user is able to copy a page from one project to another project. The user needs to follow the below mentioned steps to copy a page from one project to another.
Step 1: Click on the "Copy Page" link.

Step 2: Copy Page window opens. Enter Parameters as shown in below table and click "Submit".
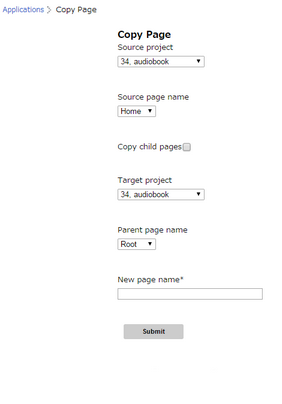
Parameter |
Description |
Source Project |
Select Source Project from where Page has to be copied. |
Source page name |
Select Source Page name which has to be copied. |
Copy child pages |
Select "Copy child pages" if child pages are to be copied. |
Target Project |
Select the Target Project to which Page has to be copied. |
Parent page name |
Select the Parent Page under which the page has to be copied or else select "Root" to set it as a Parent page itself. |
New page name |
Enter name for the page copied. |
Step 3: Success message is displayed after successful copying of the page, as shown in the Image below.

Set Color:
User can set the theme for the pages of their Application. User can set already defined theme or set Custom colors as desired.
Folow below steps to apply Set Color.
Step 1: Click on "Set Color" option on the "Applications" page as shown in image below.

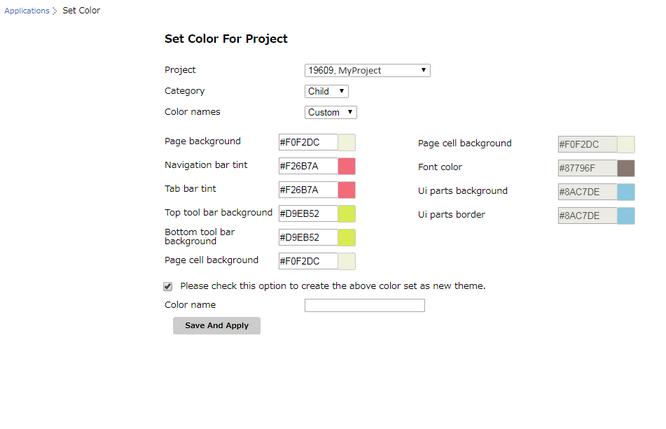
Step 2: Set Color window opens. User need to select the Project for which theme needs to be applied. Based on the theme, colors for all the parameters are set automatically.
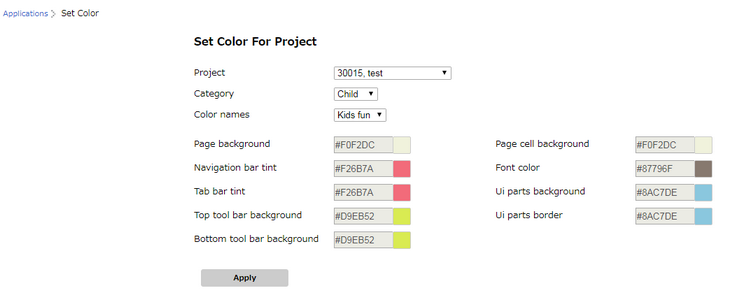
Parameters |
Description |
Project |
User can select the project from the dropdown whose theme has to be set. |
Category |
User can select predefined categories as Child or Ladies. |
Color names |
As per category selected user can select Color names e.g: Child: Kids fun, Sunny, newchild, Custom Ladies: Floral, Flowers, Custom |
Page Background |
User can select Page Background color to set the background color of the page. |
Navigation Bar tint |
User can select Navigation Bar tint color to set the Navigation Bar color. |
Tab bar tint |
User can select Tab bar tint color to set the color of Tab bar. |
Top tool bar background |
User can select Top tool bar background color to set the background color of Top tool bar. |
Bottom toolbar background |
User can select Bottom toolbar background color to set the background color of Bottom toolbar |
Page Cell background |
User can select Page Cell background color to set the background color of Page Cell |
Font color |
User can select Font color to set the color of Font. |
Ui parts background |
User can select Ui parts background color to set the background color of UI parts. |
Ui parts border |
User can select Ui parts border color to set the border color of the Ui parts. |
Step 3: User can set Custom colors by selecting "custom" under "Color Names" field. User can set the desired colors.
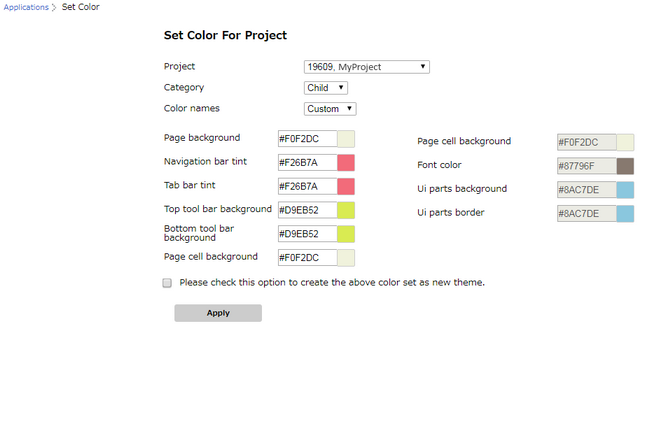
Step 4: User can select the checkbox below to set the custom colors as Custom theme which can be used later. Click on Save and Apply to apply the theme to the pages of Application.
Step 5: User can open Page of the respective project in Page Editor. The colors are applied as per setting.
