Set Image |
  
|
Set Image |
|
This action will help the user to set the image on the UI parts. To know more about the action please follow the steps given below:
Please note that this action can only be implemented on those UI parts on which image can be uploaded like Image, image button.
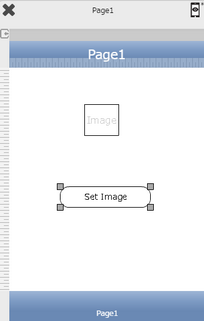
Step 1: Open a Free Layout Page.
a.Drag an Image and a RoundButton UI part and drop it on the Page.
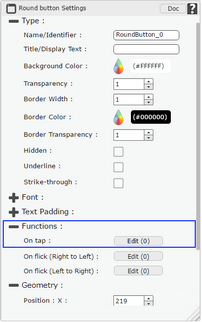
b.Browse to the "Functions" section on "Properties Palette window" of RoundButton for applying actions.
c.Click on the corresponding Edit(0) button of the Function on which user wants to apply the Action. To know more about the Functions click here.
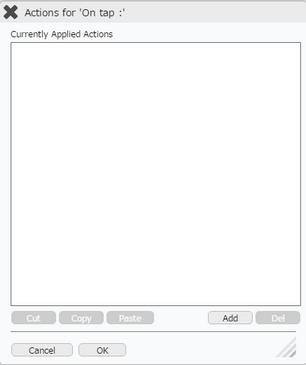
Step 2: Click on "Add" button on the Actions window to add an action. To know more about actions click here.
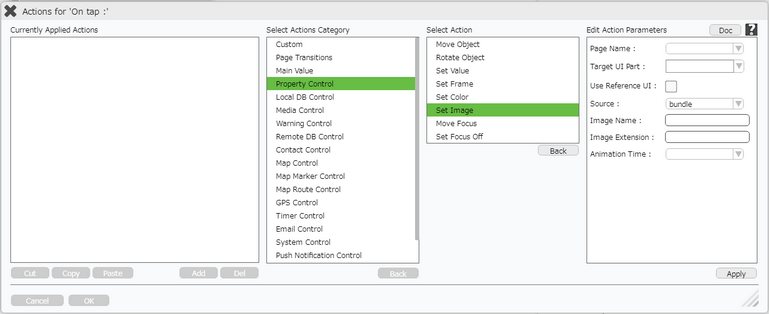
Step 3: Select the Actions category as “Property Control”.

Step 4: Click on the "Property Control" and then click on “Set Image” action.
Click here to know about "Doc" Button.
Step 5: Enter Action Parameters:-
Parameter |
Description |
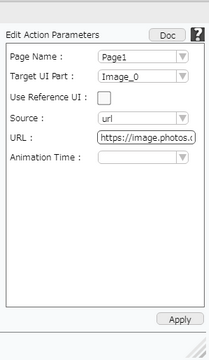
Page Name |
Select Page Name where Target UI Part is present e.g "Page1". |
Target UI Part |
Set the UI part name e.g "Image". Note: User can Type or select the Target UI Part from the Drop Down. |
Use Reference UI |
User can check this option if the source is a UI Part. |
Reference UI Part |
User need to enter the source UI Part name. This option appears if Use Reference UI option is checked. |
Source |
Select from the list, options available are Bundle, Gallery, Local, RemoteFile and URL. Note: 1.If URL selected then URL field appears. 2.If Remote is selected then Image Extension field disappears. |
URL |
User need to Specify the web url where the image is available or can be viewed. This option appears when Source is "URL". |
Gallery Image |
User can select image from Gallery of the device. This option appears when Source is "Gallery". |
Local Image |
User can provide Local Image name. This option appears when Source is "Local". |
Image Name |
User can enter the name of the Image. This option appears when Source is "Bundle" or "RemoteFile". |
Image Extension |
User need to enter Image extension e.g png. This option appears along with "Image Name" and when the Source is " Bundle". |
Animation Time |
User can provide Animation time in sec. The previous image in the image view Fades out and the new image Fades in during the Animation time given. |
Step 6: Click on "OK" button if the user doesn't want to add more actions.
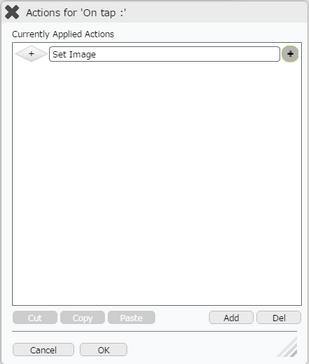
Note: Define condition if required, by clicking on "+" Condition Button on the left. Click here to know more.
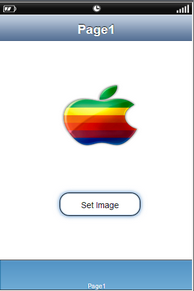
Step 7: Preview to see the output.Click "Set Image" button in the preview, observe the Image appearing as specified.