Free Option allows user to add Free Layout page to the Template. In Free Layout page, the user need to select any page from the Project Application from which template is desired to be created.
User can add elements to the page and also apply action where ever required.
Step 1: On the Template Page list, click on "+ Free" option for creating a Free layout Template Page.

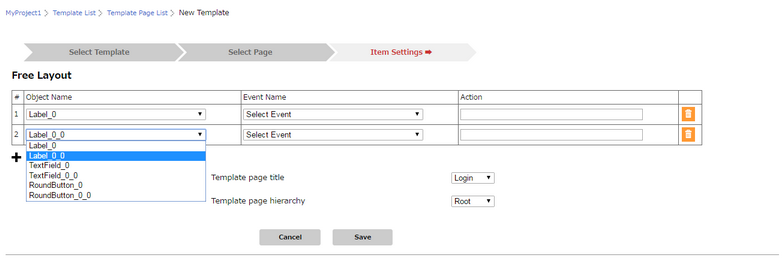
Step 2: Window for FreeLayout page opens. Select "Template page title" for e.g "Login" Page from the list of project Application pages. Click on "Add Row" to add next element/UI Part.

Parameter |
Description |
Object Name |
Object Name drop down displays the list of UI Parts of the selected Application page in "Template page title". |
Event Name |
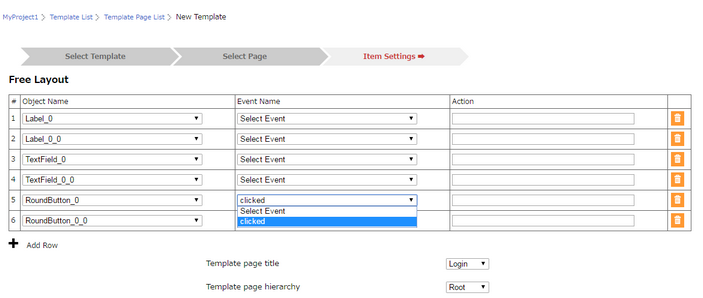
Event related to the Object/UI Part selected will be displayed in Event Name dropdown. |
Action |
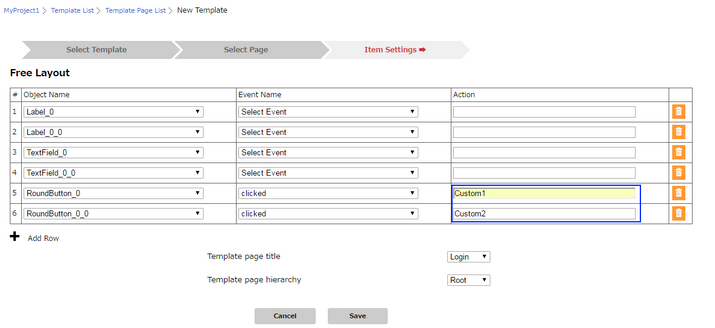
User need to add Custom Action in Page Editor. Here user need to enter required custom Action Name. This action will be associated with the Event selected. |
Template page title |
Allows user to select Project Application Page from which Template is desired to be created. |
Template page hierarchy |
Allows user to set the Page hierarchy by selecting the Parent Page for the Page to be created. |
Step 3: Click on Drop Down, select the element/UI to be added.

Step 4: Click on "Event Name" Drop Down. Select "clicked" event for adding actions.

Step 5: Add Custom Action name e.g "Custom1" and "Custom2" which are already created in the Project Application in the Action column as shown below. Click on "Save".

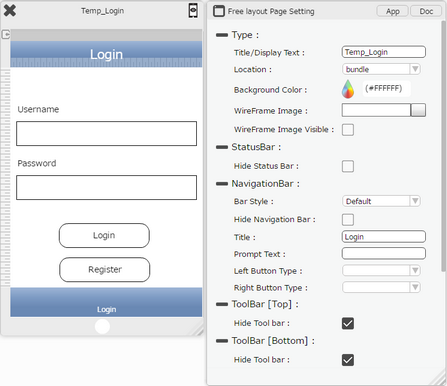
Step 6: Free Layout Template Page is created from "Login" page of the Project Application.

Step 7: Below image shows the Free Layout Template "Login" Page in Page Editor as copied from the Template Editor.
Click here to know how to Apply Template to a Project.
