Custom |
  
|
Custom |
|
Appexe allows users to create Custom action in which users can apply set of actions. Multiple Custom actions can be created. This Custom action can be used whenever required by user. To know more about this action please follow the steps given below:
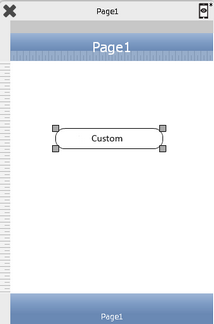
Step 1: Open a Free Layout Page.
a.Drag a RoundButton UI part and drop it on the Page.
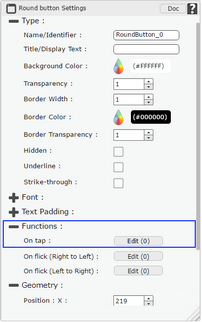
b.Browse to the "Functions" section on "Properties Palette window" of RoundButton for applying actions.
c.Click on the corresponding Edit(0) button of the Function on which user wants to apply the Action. To know more about the Functions click here.
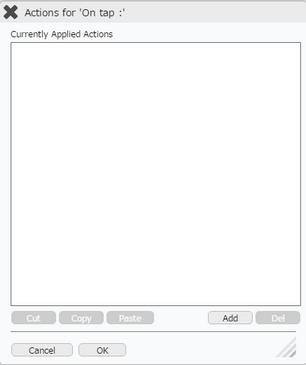
Step 2: Click on "Add" button on the Actions window to add an action. To know more about actions click here.
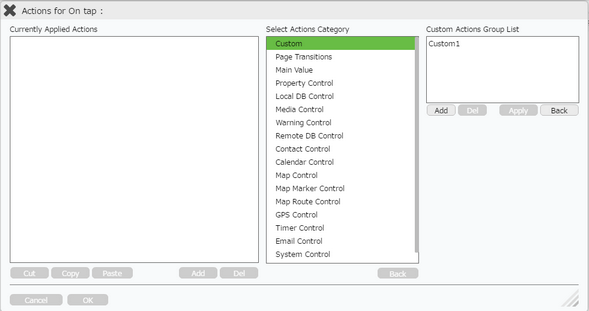
Step 3: Select the Actions category as “Custom”. Click on "Add" button under Custom Actions Group List.

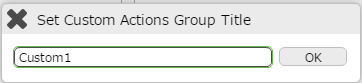
Step 4: Following pop up appears.
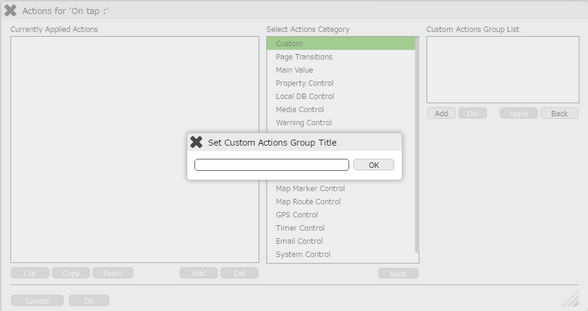
Step 5: Enter Custom Action Title and click OK.
Step 6: Click on "Add" button to add action to Custom action.
Step 7: Click on the "Page Transition" and then click on “Return to Previous Page” action. Click Apply.
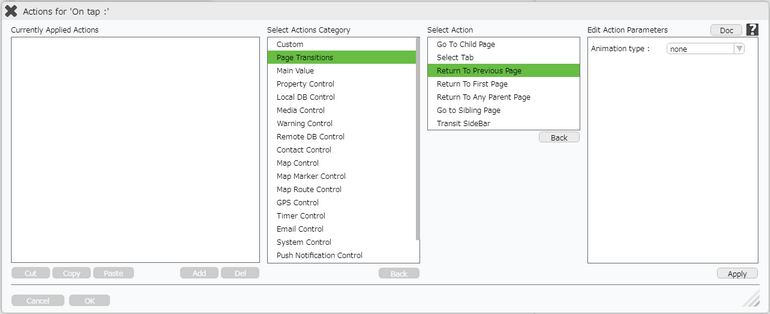
Click here to know about "Doc" Button.
Step 8: Click on the "+" sign on the right to apply action on "Success" event. Select "Success" event and click on "Add" button below. Click on the "Main Value" and then click on “Reload the Updated Data” action.
Select Page Name under "Edit Action parameters" and Click apply.
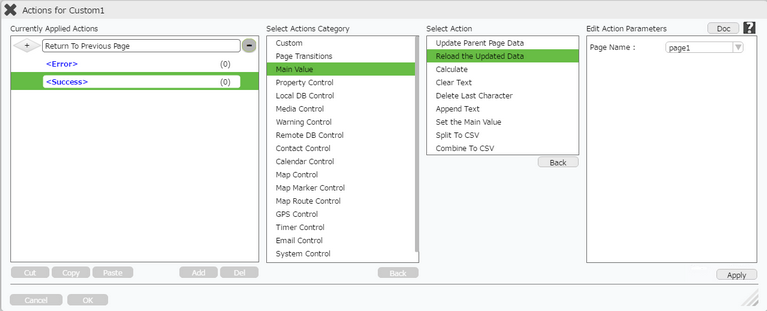
Step 9: Success Action added as shown below. Click "OK".
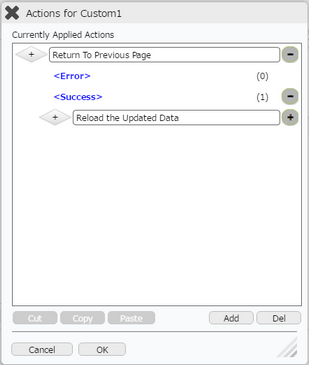
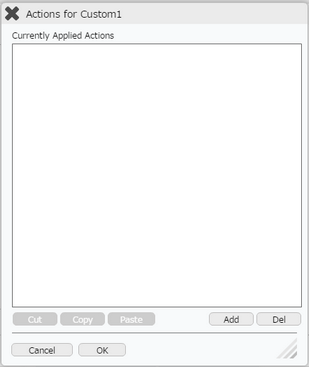
Step 10: Custom action is added as shown below.
Step 11: Select Custom action and Click on Apply.
Note:
1. User can select Custom action and Click on "Del" button to delete the action.
2. User needs to preview the app before closing the Page Editor to save the applied custom action.