Upload Media |
  
|
Upload Media |
|
This action will allow the user to upload Image file or Sound File and return a "Remote Id" attached to it . To know more about this action please follow the steps given below:
Step 1: Open a Free Layout Page.
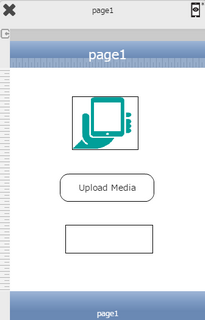
a.Drag a Image View , RoundButton and TextField UI Part and drop it on the Page as shown in the image below.
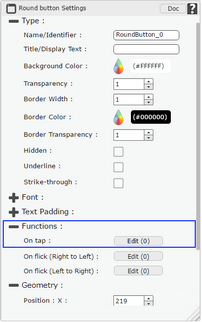
b.Browse to the "Functions" section on "Properties Palette window" of RoundButton for applying actions.
c.Click on the corresponding Edit(0) button of the Function on which user wants to apply the Action. To know more about the Functions click here.
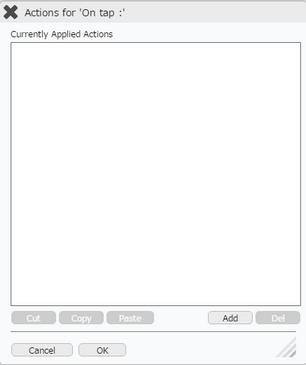
Step 2: Click on "Add" button on the Actions window to add an action.To know more about actions click here.
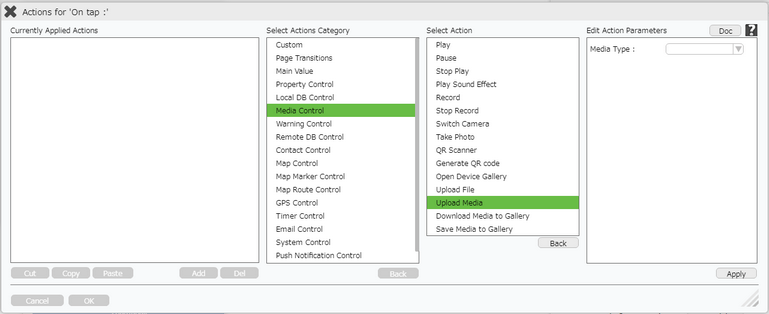
Step 3: Select the Actions category as “Media Control”.

Step 4: Click on the "Media Control" and then click on “Upload Media” action.
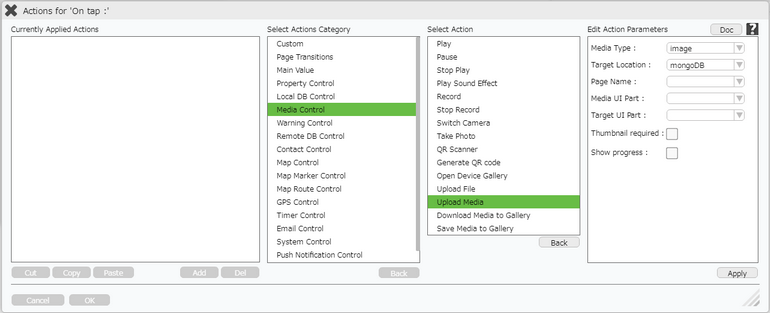
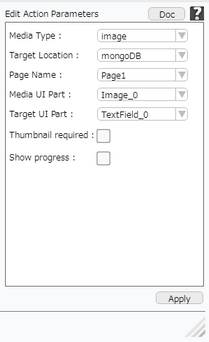
Step 5: Enter Action Parameters:
Parameter |
Description |
Media Type |
User can select the Media Type as "Image" or "Sound". |
Target Location |
Target Location is the server where user wants to upload the media. |
Page Name |
Select the name of the Page from Drop Down. |
Media UI Part |
Media UI Part is the UI Part which contains the Image. "Image_0" |
Taret UI Part |
Select the Target UI Part Name which will contain the Mongo Server Id received while uploading the file. |
Thumbnail required |
Thumbnail allows user to store a thumbnail image of the media in the Server. |
Show progress |
Show Progress allows user to see the progress during Upload Media Action |
Step 6: Click on "OK" button if the user doesn't want to add more actions.
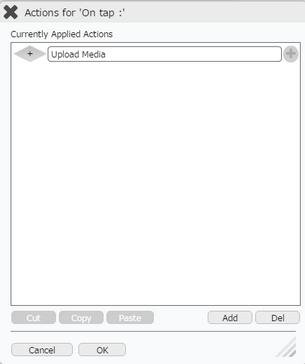
Note: Define condition if required, by clicking on "+" Condition Button on the left. Click here to know more.
Upload Media Usage:
Step 1: User needs to create another Page "Page2".
1.Drag and Drop Image View to the Page.
2.Set Location of Image View as "remotefile".
3.Enter Remote ID as the Field name where the Remote ID of the Media file is stored through "Upload Media" Action as explained above.
Step 2: Image corresponding to the Remote ID entered , appears on the Image View UI.
