Upload File |
  
|
Upload File |
|
This action will allow the user to upload pdf file into the server and return a "Remote Id" attached to it, which is used for retrieving the uploaded pdf file. To know more about this action please follow the steps given below:
Step 1: Open a Free Layout Page.
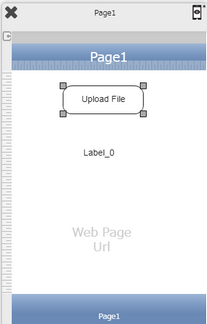
a.Drag a RoundButton, Label UI Part and WebView and drop it on the Page as shown in the image below.
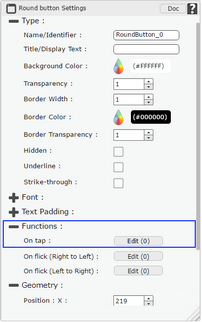
b.Browse to the "Functions" section on "Properties Palette window" of RoundButton for applying actions.
c.Click on the corresponding Edit(0) button of the Function on which user wants to apply the Action. To know more about the Functions click here.
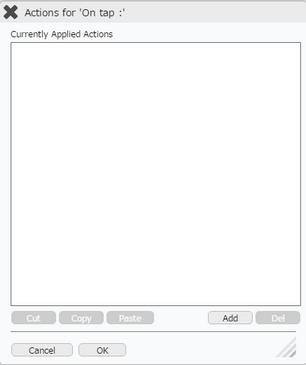
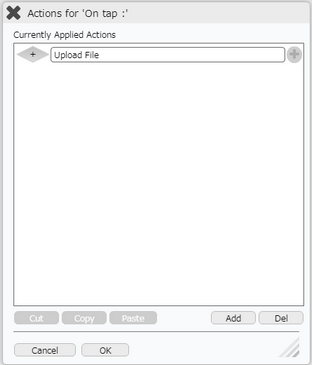
Step 2: Click on "Add" button on the Actions window to add an action.To know more about actions click here.
Step 3: Select the Actions category as “Media Control”.

Step 4: Click on the "Media Control" and then click on “Upload file” action.
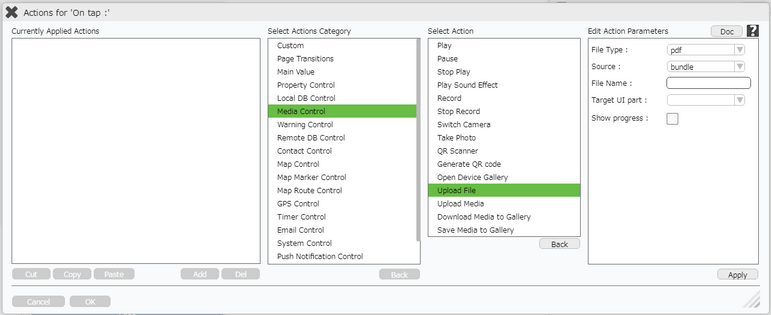
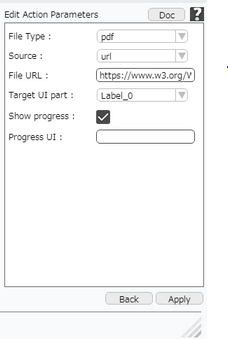
Step 5: Enter Action Parameters:
Parameter |
Description |
File Type |
User can select the File Type as "pdf". |
Source |
Source is the source from where the pdf file is fetched. e.g Bundle- The file is in the resource manager of the project. device- The file is in the user's device. url- User can provide the url of the pdf file |
File Name |
User need to provide File Name if the File type is Bundle. |
File URL |
File URL option appears when File type is URL. |
Target UI Part |
On uploading pdf file, a remote ID will be returned. This ID will be saved in this Target UI Part. |
Show Progress |
On selecting Show Progress, user can view the progress while file is getting uploaded. |
Progress UI |
User can drop a Progress UI Part on the Page to view the progress. Progress UI option allows user to select the Progress UIPart. |
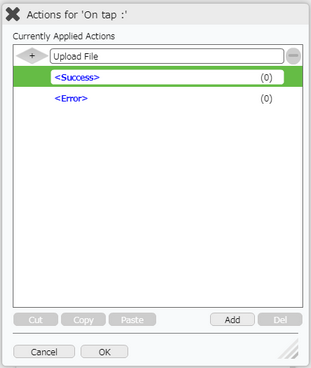
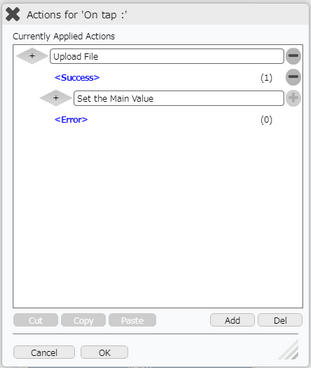
Step 6: Click on "+" button on the right of the Upload File action to apply action on "Success" event. Click on "Success" event and click on "Add".
Step 7: Click on the "Main Value" and then click on “Set the Main Value” action.
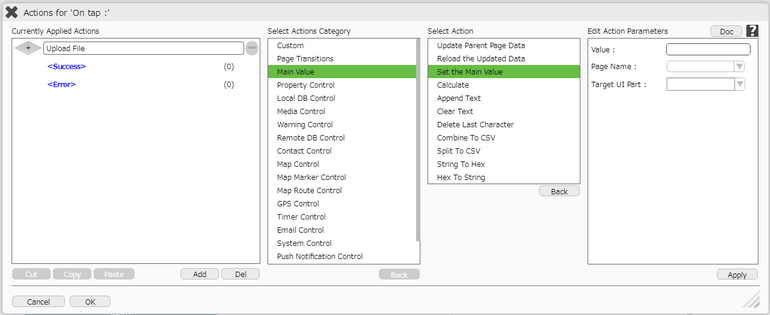
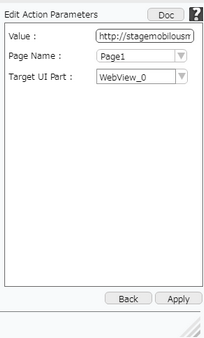
Step 8: Enter Action Parameters:
Parameter |
Description |
Value |
User need to provide the reference Id returned on upload of pdf file. i.e User instancename/images/[target ui part name where upload file ID is stored] e.g instancename/images/[Label_0] |
Page Name |
User can select the Page where the value has to be set. |
Target UI Part |
User need to select the WebView as the target UI Part, to display the pdf uploaded . |
Step 9: Click on "OK" button if the user doesn't want to add more actions.
Step 10: Click on Preview , observe the file uploaded will be displayed in the Webview.