Remote file |
  
|
Remote file |
|
Remote File is used to load Image from the Remote Server.
To apply this functionality, one needs to use the Take Photo functionality. Follow the steps to know more.
Step 1: Create a "Parent Page". Drag and Drop Camera UI Part on the Page and a Round Button UI Part.
Step 2: Set Camera UI Part Name/Identifier property in the Properties Palette Window.
Step 3: Create a "Child Page". Drag and Drop Image View UI Part to upload image.
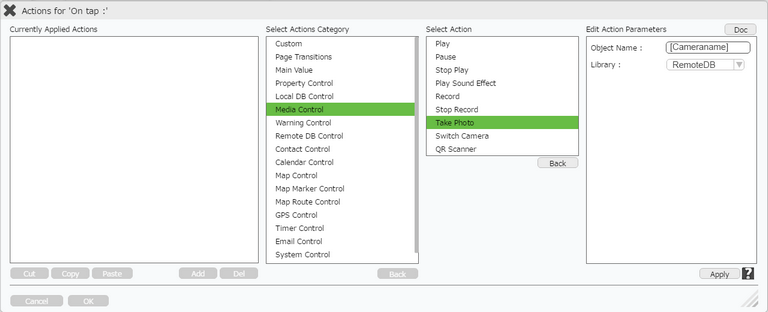
Step 4: Open "Parent Page", Apply "Take Photo" action under "Media Control" Actions Category on the Round Button.
Enter Action Parameters:-
Parameter |
Description |
Name |
Name/Identifier of the Camera UI Part in square brackets. |
Library |
Select "RemoteDB", the image taken gets saved in Remote DB. |
Step 5: On Success of "Take Photo" action, apply "Go to Child Page" action with Transfer Data .
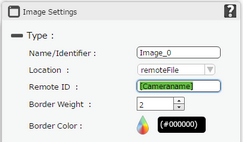
Step 6: Open "Child Page":-
1) Set "Location" of Image View as "RemoteFile".
2) Set "Remote ID" as "[Cameraname]". Here the Camera name is the same as the Parent Page.
Step 7: Preview the App to find that :-
1) The "Parent Page" inserts image to the Remote Server.
2) The "Child Page" fetches the Image and Displays from the Remote Server.