Local Database |
  
|
Local Database |
|
Local database means the data which resides on user's device. User can add, remove, edit or copy the Local database of the application.
1. Add local Database:
To add the local database in the application follow the steps below:
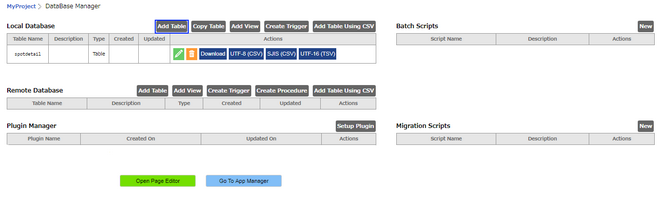
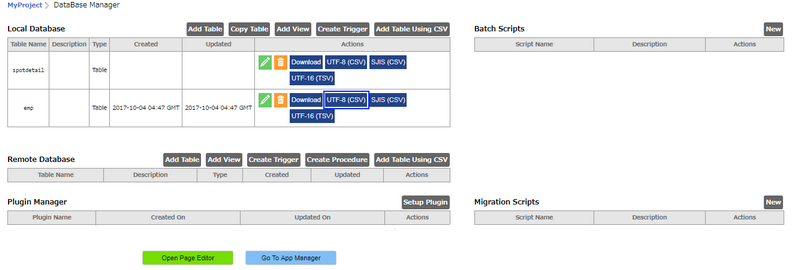
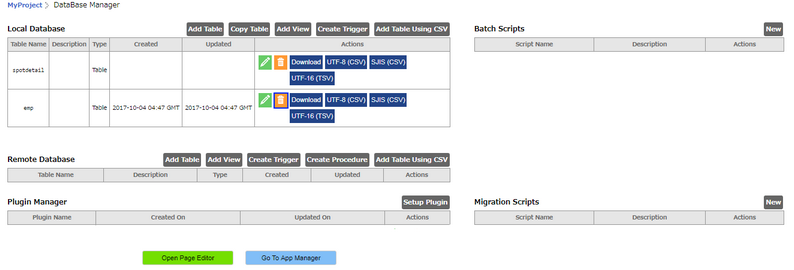
Step 1: From the Database manager page user needs to click on the "Add Table" button of the local data base table.
Step 2: User will see the Local Database table over lay.
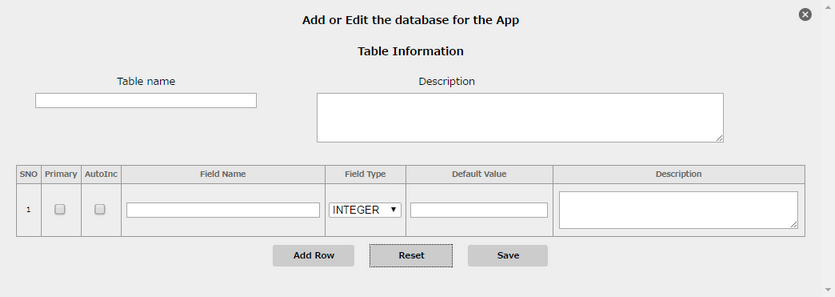
Step 3: The user will have to enter the "Table name" and the "Description" of the table in the table name and description fields. It’s mandatory for a user to enter the table name.
User needs to provide the following field details for the table.
Parameters |
Description |
Primary |
Primary means that this field has unique value. For e.g "id" of every person is unique and cant be same. It is referred as Primary Key. Note: User can select more than one field as Primary Key. |
Auto Increment |
An auto increment field can be checked only if the type selected is integer. Auto Increment means the data will be automatically incremented by 1. |
Field Name |
It is the name of the field. |
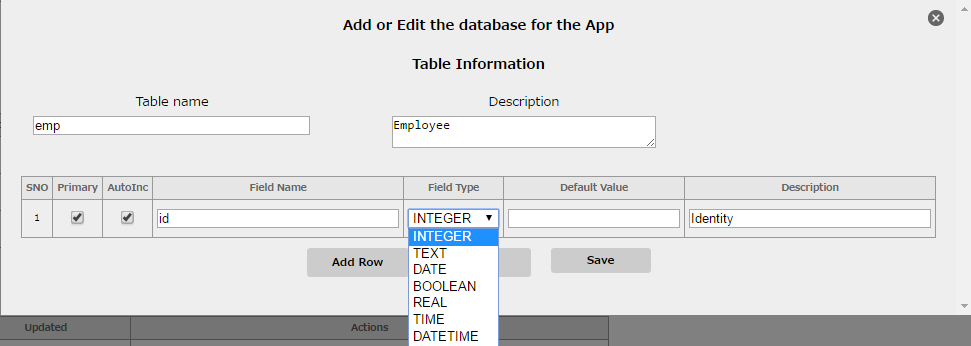
Field Type |
Allows to select type of the field. It can be "Integer", "Text", "Date", "Boolean", "Real","Time", "DateTime".
Integer: An integer is a number that can be written without a fractional or decimal component. For e.g 21, 4, and −2048 are integers.
Text: Text can be alphanumeric (Combination of alphabetic and numeric characters). For e.g "address1".
Date: The format of date in the CSV file should be YYYY-MM-DD.
Boolean: Boolean data type is a data type, having two values (usually denoted true and false).
Real: A real is a number that includes both integer −5 and fraction 4/3.
Time: The format of Time in the CSV file should be HH:MM: ( SS ).
DateTime: The format of DateTime in the CSV file should be YYYY-MM-DD HH:MM: ( SS ).
|
Default Value |
Default value is the value which is taken in the database in case no value is passed for a particular field. Note: 1.For "Text" Field type, Default value is always NULL. 2.In Update Action, Default value for Date, Time, DateTime and Integer are NULL. |
Description |
Brief description of the field can be added. |
Please note that:
1. The name of the table should never have spaces, should be in lower case and not have any special characters like - “, ‘:;./?><=+-*&%$#@!`~][}{\|
2. If the table name has to have two or more than two words, then the user can add an underscore sign ”_” between the words.
3. There are some reserved words which can not be used as the Table Name. To know more about Reserved Words click here.
Step 4: Click on the provided "Add row" button to add the Table Fields. A new row will be added to the overlay.
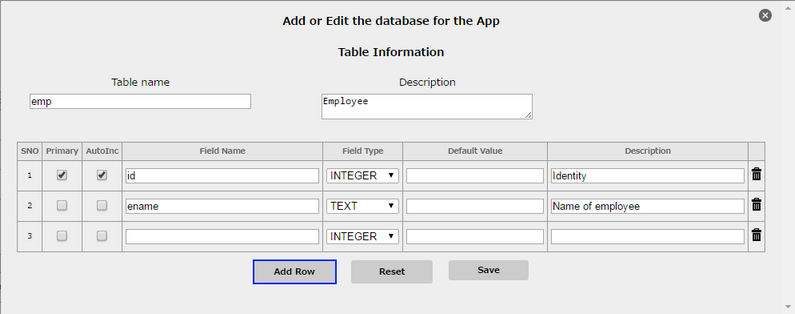
Similarly the user can add any number of fields in the database.
Note:
1. One field must be defined as primary.
2. The field name can not be the reserved words. Please click here to know more about reserved words.
3. If the user wants to delete the field from the table the user can click on the delete icon on the over lay.
4. User can click on "Reset" button to reset the fields and refill the Table Information.
Step 5: After adding all the fields click "Save" button. On clicking on the save button the over lay will be closed and the table name will be added to local database.

2. Upload data in local Database:
User needs to follow the below mentioned steps to add a data in the table.
Step 1: User needs to click on the download icon that was appearing in the Actions column of the local Database table.

Step 2: When the user clicks on the "Download" button the csv file will be downloaded to the system i.e. a Comma Separated Value file will be downloaded to the user system where the user can fill the records.
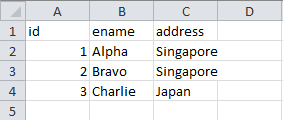
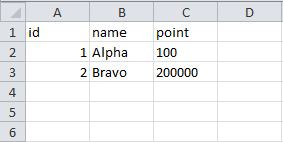
Step 3: Save the file on your machine and open the file and enter the record details and save the file in the same format.
User can manually enter the data or can copy and paste it from other excel file.
Step 4: Click on the "UTF-8 CSV" button to upload the file.
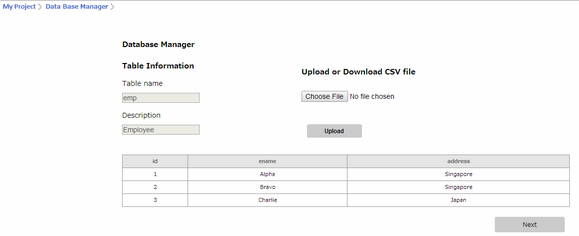
Step 5: On clicking on the "UTF-8 CSV" button the page will navigate to the Data base manager table information page. User needs to click on the "Choose File" and choose the csv file.
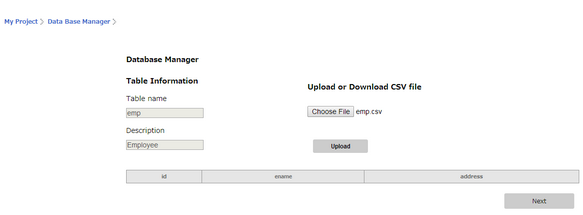
Step 6: Click on the "Upload" button the data in the csv file will be appearing here. Click Next to proceed which will redirect the user to the Database manager page.
Load SJIS
"Load SJIS" means to upload the CSV in SJIS format i.e Shift Japanese Industrial Standards. SJIS is a character encoding for the Japanese language.
"Load from CSV" data loads data in UTF -8 format i.e (Universal Character Set Transformation Format which encodes character in Unicode), so , to store data in Japanese format "Load SJIS" option is used.
Following image shows the data in the Japanese Format.

Following image shows the data in the CSV Format.
UTF-16 TSV
UTF-16 TSV loads data in UTF-16 format which is a 16 bit Unicode character encoding for all possible characters.
3. Edit Local Database Table:
The user can edit the local database table by following the below mentioned steps.
Step 1: Click on the edit icon that is appearing in the action column of the table.

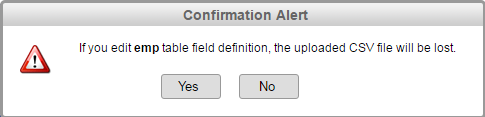
Step 2: A warning pop up window appears asking for the user confirmation to edit the table or not , warning user about uploaded CSV file getting lost on Edit. Click on the "Yes" button.
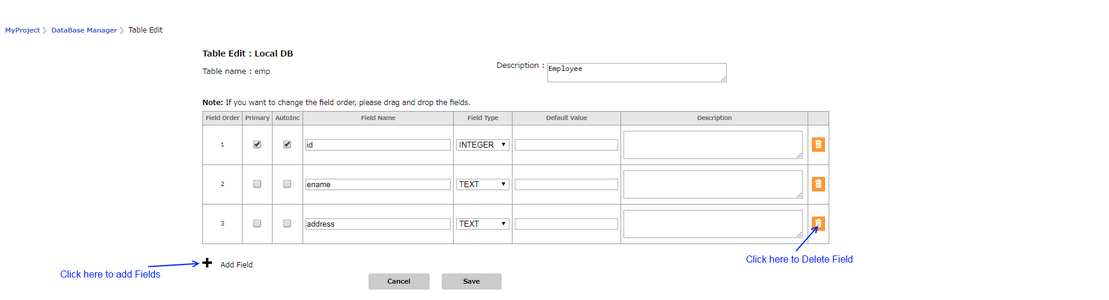
Step 3: On clicking on the Edit button the page navigates to the "Table editor: Local DB page".
The user can perform the following operations in this page:-
a. To add a new field the user needs to click on the "+" icon a new field will appear in the existing table where the user can provide a new field details.
b. The user can delete the existing field by clicking on the delete icon.
c. The user can edit the Field name, Field Type and Description of any field.
Click on the "Save" button. It will redirect the user to the Database manager page.
4. Delete Local Database Table:
The user can delete the local database table by following the below mentioned steps.
Step 1: Click on the delete icon that was appearing in the actions column of the table.
Step 2: A warning pop up message appears asking for the customer confirmation to delete the table or not. Click on the "yes" button to delete the Table.
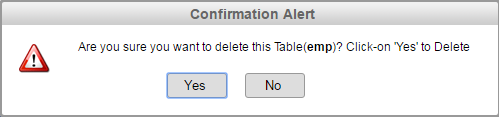
Note: The user can click on the "No" button in the warning message to terminate the delete table process by doing so the table wont be removed from the local database table.
Step 3: The table will be deleted from the local data base table.

5. Copy Database Table.
User can Copy tables. Click here to know more.
Note:
Add table using CSV is a feature through which user can add Table using CSV template.
This CSV template can be downloaded from Database Manager in Console after clicking on "Add Table Using CSV" option.
User can fill Table name , Table Description, Field names, Field Type, Primary Key, Auto Increment etc in this Template.
This CSV can be uploaded and the desired table will be displayed in Database Manager, where user can upload its data CSV.
