Images |
  
|
Images |
|
Images option allows to upload images required in the application. The Image should be .png, .jpg, .jpeg, .gif format only and File name should not contain any spaces.
Step 1: Select Images from the "Filter By" Drop Down.
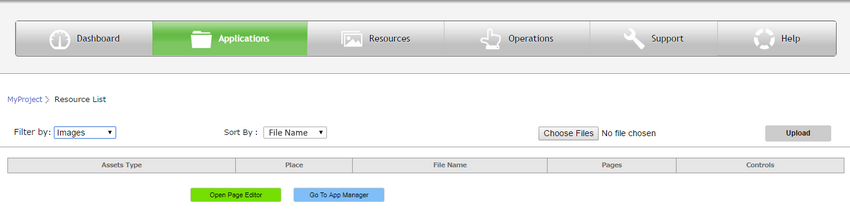
Step 2: Choose Resource file by clicking on "Choose File" Button.
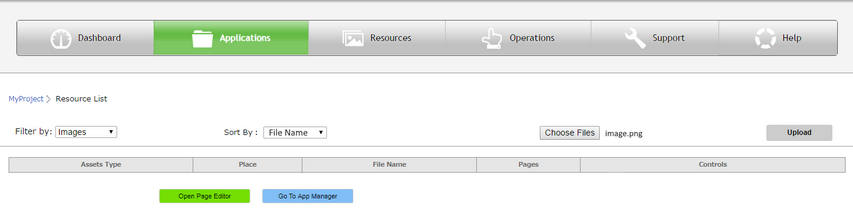
Step 3: Click on "Upload" to upload the file. The file gets displayed in the list.
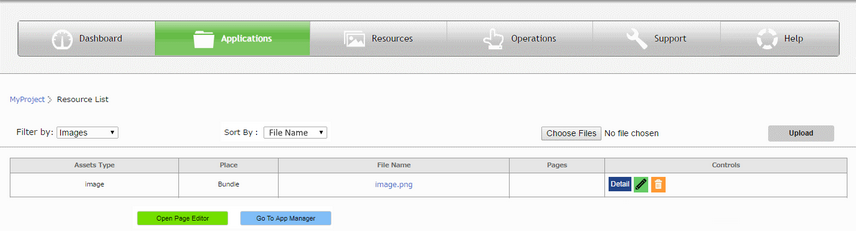
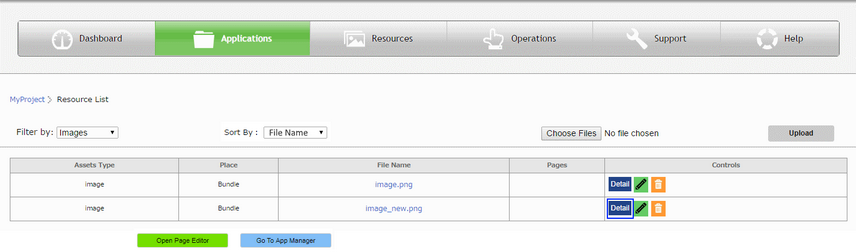
Step 4: Click on the edit icon, under controls column corresponding to the Image file in the list, as shown in the figure below to edit image.
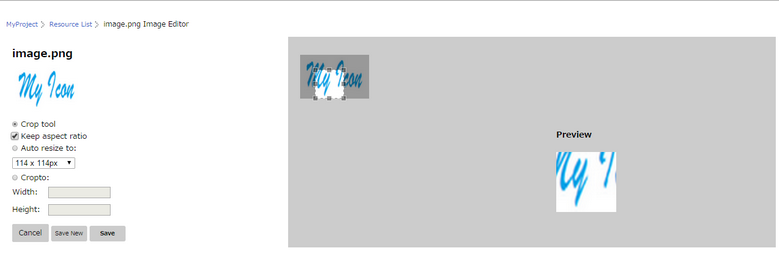
Step 5: Below window appears, allowing user to Edit the Image.
Note: If user clicks on the "FileName" link in the above image, the below window only gets opened.
Parameter |
Description |
Crop Tool |
Select the Crop Tool option to crop the Image. |
Keep Aspect Ratio |
Select this option to maintain the Aspect Ratio while resizing Image. |
Auto resize to |
Select this option to resize the Image by selecting fixed dimensions from the drop down list. |
Crop to:Width |
Enter the width to crop the Image. |
Height |
Enter the Height to crop the Image. |
Cancel |
Click on "Cancel" Button to cancel editing and go back to previous page. |
Save New |
Click on "Save New" Button to create a new image. |
Save |
Click on "Save" Button to save the changes. |
Step 6: Below Image shows the Cropped Image. Click on "Save New" Button to save as a new Image.
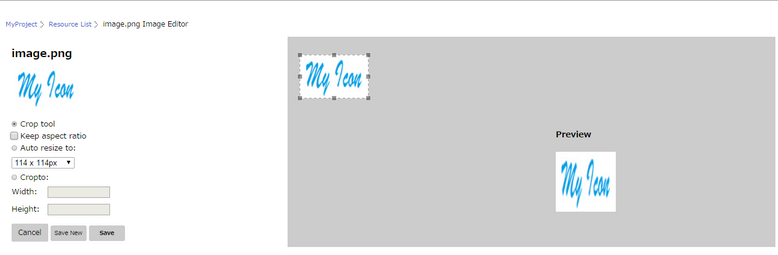
Step 7: Below Image shows the new Image saved in last step. To Preview the Image click on "Detail" button in the Controls column corresponding to the new Image.
Step 8: The Detail button give a preview of the Image as shown below.

Step 9: To Delete the Image file, Click on Delete icon, under Controls column corresponding to the new Image.

Step 10: The Image gets deleted from the list as shown below.