Enable UI |
  
|
Enable UI |
|
Enable UI functionality allows user to Enable or Disable UI Parts on the Page on Preview. It can also be used when multiple screens are there. User can make any UI Part enable/disable on any screen. To know more about this please follow the steps given below:
Enable/Disable UI Parts on single Screen:
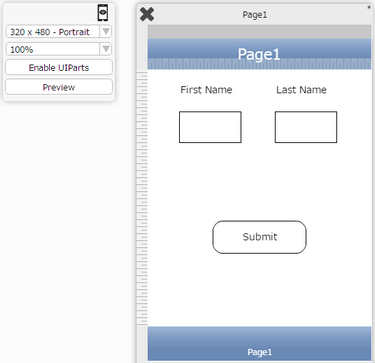
Step 1: Open a Free Layout Page. Drag and drop UI parts on the Page.
a) First image below shows the Page with the UI parts.
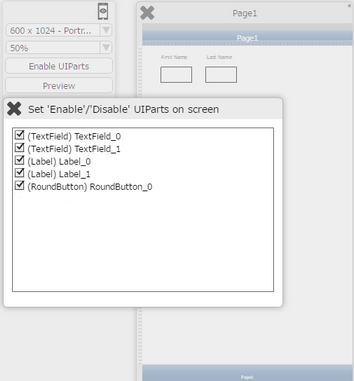
b) Open the pop up window by clicking the Preview button on the right top corner.
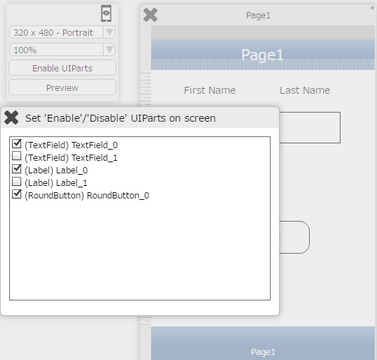
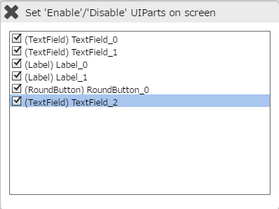
c) Click on "Enable UIParts". List of all UIParts are displayed as shown in second image below. Uncheck the UIParts which need to be disabled or hidden for e.g "TextField_1", "Label_1".
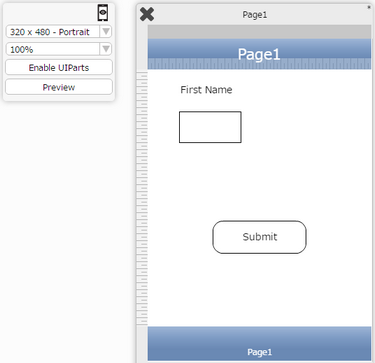
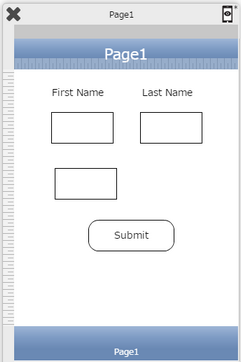
Step 2: Following screen shows the unchecked UIParts are Disabled and only checked UIParts are visible.
Enable/Disable UI Parts on Multiple Screen:
Step 1: Open a Free Layout Page. Drag and drop UI parts on the Page.
a) First image below shows the first screen resolution(320*480) with the UI parts.
b) Open the pop up window by clicking the Preview button on the right top corner.
c) Click on "Enable UIParts". List of all UIParts are displayed as shown in second image below.

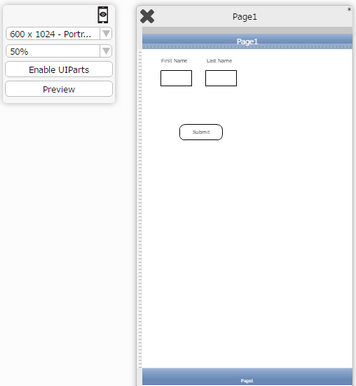
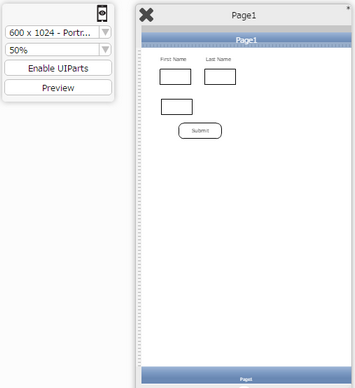
Step 2: For Multiple screens user can Create another screen resolution e.g (600*1024). This screen gets updated with the UI parts added as above.
(Note: Any UIPart added later will not be reflected in the new screen resolution)
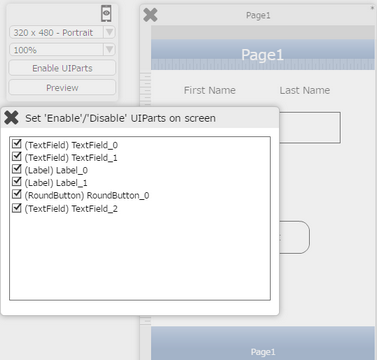
Step 3: Open the page and add one TextField UI on the Page as shown below in first image. Click on "Enable UIParts" in preview pop up to see the TextField UI added in the list in second image
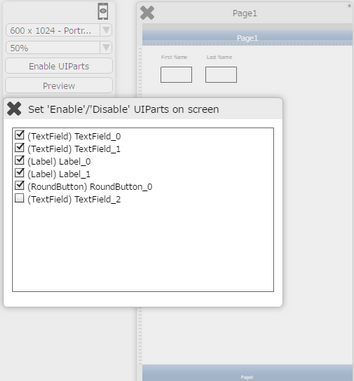
Step 4: Open the new screen resolution (600*1024) by clicking the preview button. The new TextField added is not shown on the Page. Click on the "Enable UIParts"as shown in the first image. The new TextField added is Disabled as shown in the second image below.
Step 5: Enable the TextField option by selecting it. As the TextField gets enabled ,the UI Part is visible on the new screen resolution as shown in second image below.
Note:
Enable UI functionality is not applicable for UI-parts which are implemented on the Tool-bars and Custom table cell style of DB pages(DB List View , DB Record View, Fixed List View and Fixed Record view page).
Click here to know how to set Master and Slave Screen.