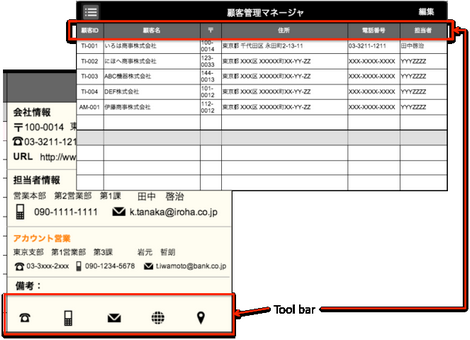
Page Toolbar is a rectangular view area, like small part of free layout page, that can be placed on top or bottom of the page. User can add UI parts inside it.
Types of ToolBar:
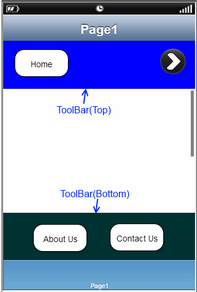
1.ToolBar(Top): ToolBar(Top) allows to add ToolBar on the Top of the Page just below Navigation bar.
2.ToolBar(Bottom): ToolBar(Bottom) allows to add ToolBar at the bottom just above the Tab bar.
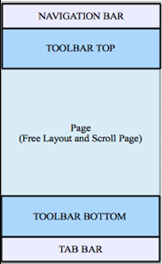
The image below displays the toolbar layout added on top and bottom of a free layout page. Both Navigation bar and Tab Bar are enabled on this page.
Follow the Steps to add a ToolBar.
Step 1: Click on File -> New from the menu to open a new Page.
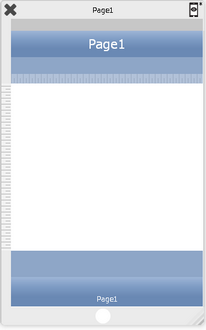
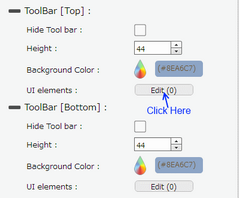
Step 2: Click on the Edit(0) button corresponding to "UI elements" property to create a ToolBar[Top] as shown below.
Step 3: A new ToolBar window appears over the Page opened.
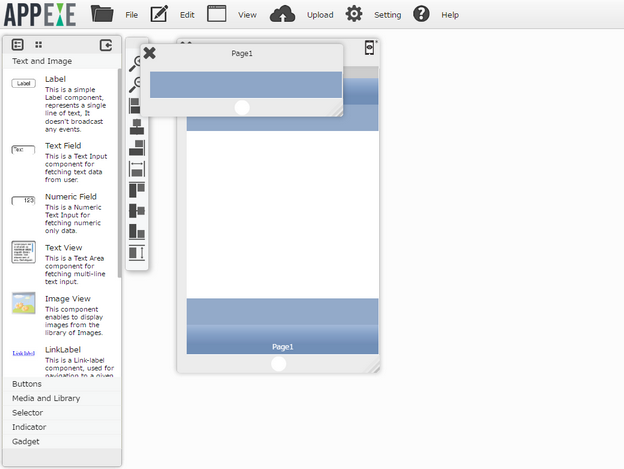
Step 4: Please follow these steps below:
1. Drag and Drop the desired UI elements on the Tool Bar Window.
2. Enter Display Text property and modify other UI Part specific properties if required.
3. Click on Edit(0) Button in Functions to add any actions to the UI Part added above. Click Here to know more about Functions.
4. Close the ToolBar window to save the changes for ToolBar [Top].
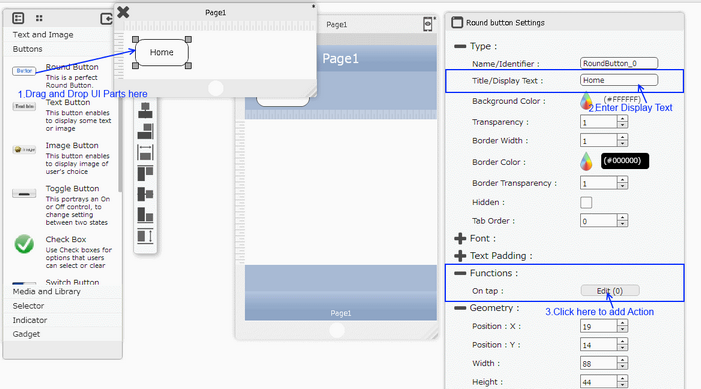
Sample Page:-
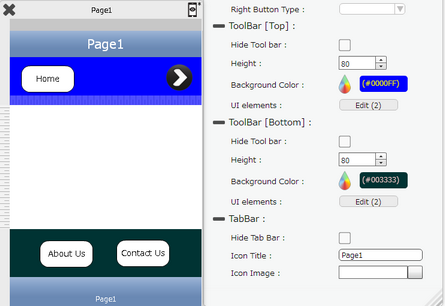
Other property settings available for ToolBar
•Height: This sets or changes the height of the Toolbar on the Page. Default value is 44px.
•Background Color: This can be used to change the default while color to any desired color.
•UI Elements: This property allows user to add new UI Parts onto the toolbar.
Preview of Sample Page:-
Additional information for Page ToolBar
Following Media related UI Parts that are not supported for adding on ToolBar:
•Video box
•Audio box
•Camera
•MapView
A more practical or advanced usage of ToolBar can be seen on the Image below:
