Testing process allows the users to test the developed application on mobile devices by generating the respective installation files (android, iOS and Windows).
Follow the steps below to know more.
Step 1: Click on the project icon which has to be tested.
![]()
Step 2: Click on the "Edit" button.
![]()
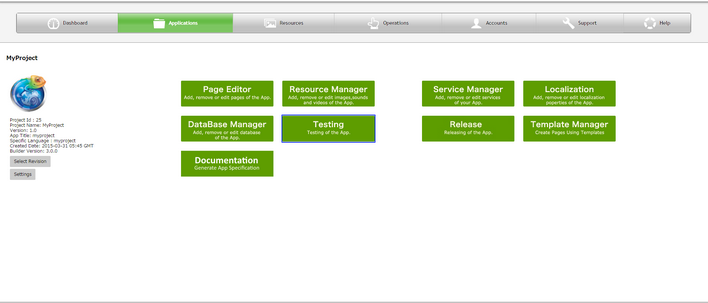
Step 3: Click on the "Testing" on the Application Manager page.

Step 4: Testing Manager window opens.

1.Add Member
Step 1: User can add members here so that the test Email would be sent to the members as well. Click on "+" to add member.

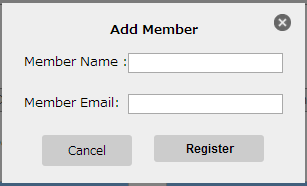
Step 2: Add Member overlay opens as below. Enter Details and Click on "Register".
Member Name: Enter name of the member.
Member Email: Enter email of the member.

Step 3: Member is added as shown in the image. Check the "Send" checkbox to send the Publish Email to the corresponding member also.

2.To find the MAC Address of device.
To test an Application, the MAC Address of the device on which the app has to be tested has to be Registered.
Note: Users can skip this step in case the MAC address of the device is known and continue to third step i.e "Register MAC Address".
Step 1: Click on the "Get Your MAC address" Link provided.

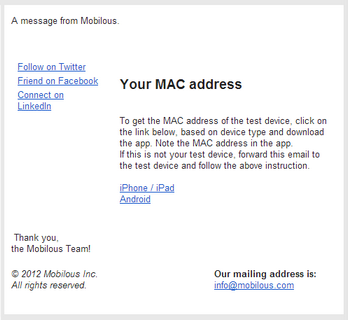
Step 2: The User will receive an email on registered email address from support with subject "Your MAC address":

To get the MAC address of the test device:
i)Click on the given link based on the device type.
ii)Download and Install the app on the device.
iii)At the bottom of the screen, user will see the MAC address of the device.
3.Register MAC Address
Step 1: If the user has the MAC address, click on "+" to Add device.

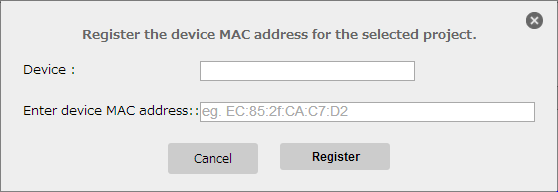
Step 2: Enter the Device and the MAC address in the provided area. Click on "Register" button. We suggest not to register more than 10 MAC addresses.
User can cancel the process by clicking on the "Cancel" button.

Step 3: Once user clicks on the Register button, then hashed MAC address for the device will be generated as shown in image below. Hence user can only run the application on these registered devices. User can delete the previous MAC address by clicking on the corresponding delete icon provided.

4. Test Publish:
Step 1: Click on "Test Publish" button as shown in the below image. This generates installation files for Android, iOS, Windows and Mobile Web for the App. These files are sent to the registered and member emails. Files can be installed for testing. Click here to know more.

Step 2: Publishing starts as shown below.

Step 3: Publishing completes and following window opens. Users can click on "Resend Email" to resend the publish mail.

Note:
1. As long as MAC address is registered, user can run the apps.
2. Desktop Testing is done through the preview/mobile web link only as there is no installation file for Desktops/Notebooks. This does not require the MAC Address of the Desktop
Preview/Mobile web link is:
Not supported for Safari Browser on Windows platform.
Supported on Chrome Browser on Windows platform.
Supported on Safari Browser on MAC platform.
The user can follow the manual process to get the Device MAC address. To know more click here.
To know about the App Installation process, please click here.
Click here for Device Details.