Insert Record |
  
|
Insert Record |
|
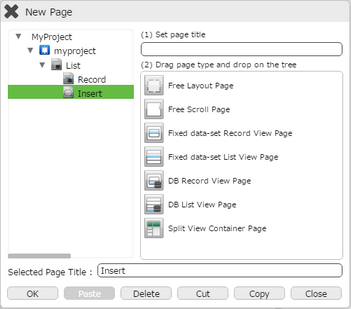
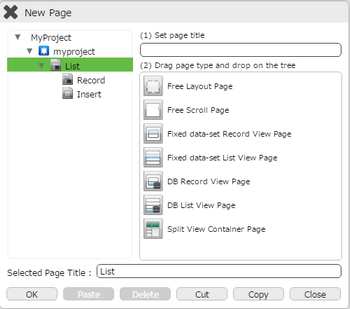
Step 1: Click on File ->New, Set Page Title as "Insert", Select Free Layout Page.
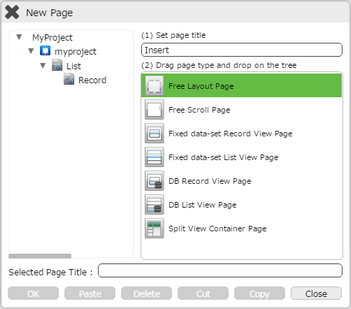
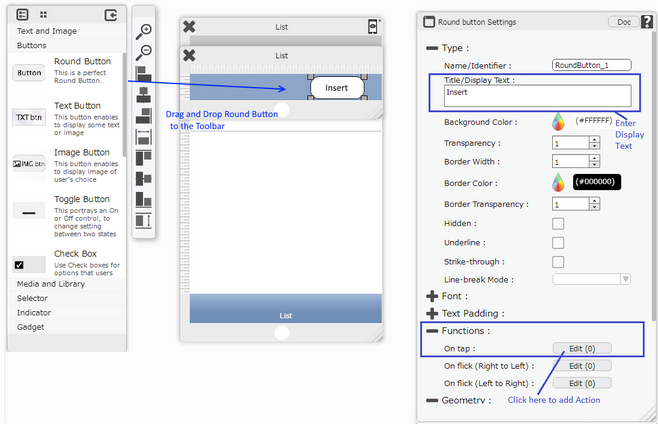
Step 2: Drag and Drop it on the List page on the left side as shown in image.
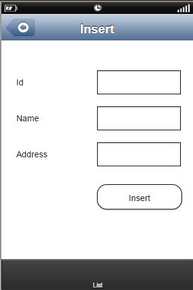
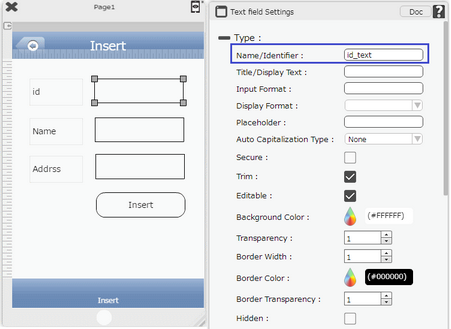
Step 3: Open "Insert" page. Drag and Drop three labels, three TextFields to enter data corresponding to the table fields and a RoundButton to the page .
Set the Name/Identifier Property of TextFields as id_text, ename_text, address_text corresponding to the Database fields id, ename and address.
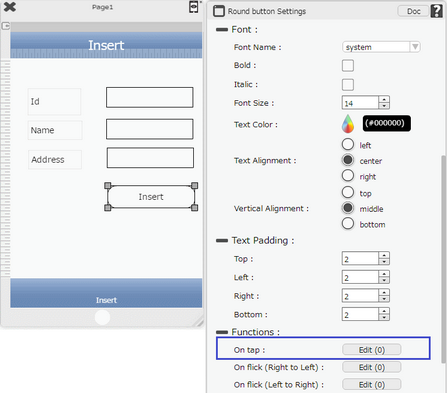
Set the Name/Identifier Property of RoundButton as "Insert".
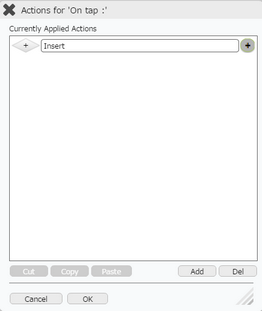
Step 4: Click on Edit(0) button of "Insert" RoundButton corresponding to "On Tap" function.
Step 5: Actions window open. Select "Local DB Control" Actions Category, click on "Insert" Action.
Enter Action Parameters:
Parameter |
Description |
Table Name |
Select the Tablename in which data has to be inserted for e.g "emp". |
Record |
Define the Record.For each field in the table a record has to be added, by clicking on "Add". |
Field Name |
For each record Fieldname is the name of the field in the Database table. |
Value |
For each record Value is the data entered in the TextField,which can be obtained by using TextField name in square brackets.like "[TextField]" e.g "[id_text]", "[ename_text]","[address_text]" |
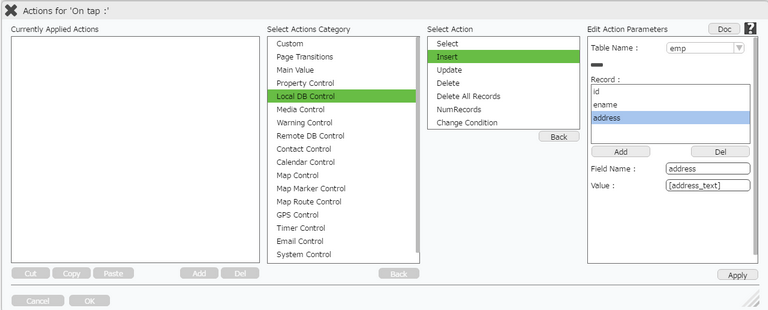
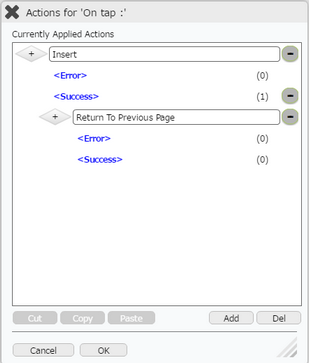
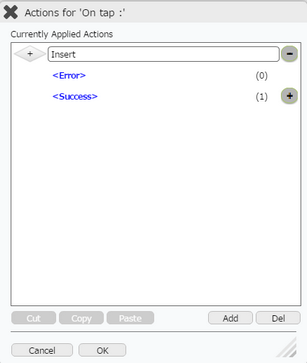
Step 6: Insert action is added as shown in first image below. To apply action on the success of the "Insert" action, click on the "+" Action Event Button on the right to view the success event. The events are displayed as shown in second image.

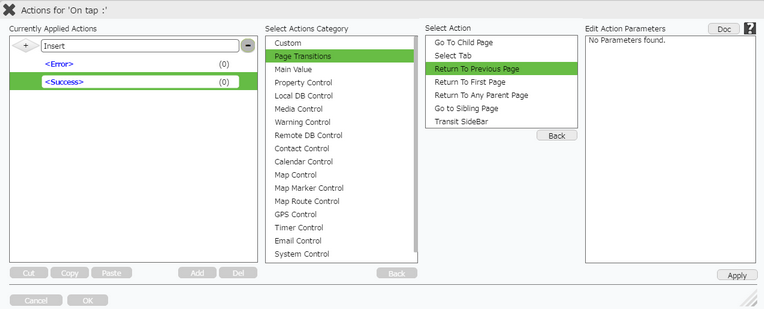
Step 7: Select "Success" event and click on "Add" button below. Select "Page Transition" Actions Category, click on "Return To Previous Page" Action.
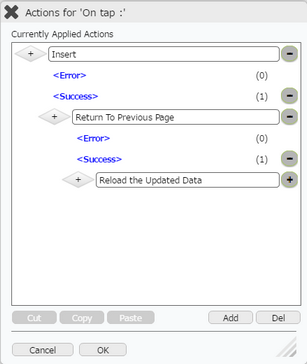
Step 8: Return to previous page Success action is applied as shown in first image. Click on "+" Action Event Button on the right of this action to add another Success action. The events under "Return to previous page" action is displayed as shown in second image.

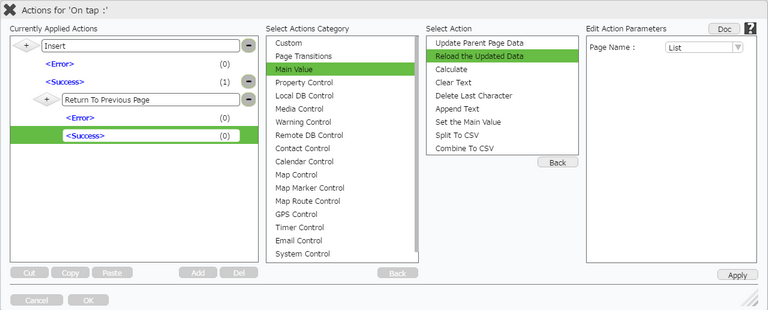
Step 9: Select "Success" event and click on "Add" button at the bottom to add action. Select "Main Value" Actions Category, click on "Reload the Updated Data" Action.
Enter Action Parameters:
Parameter |
Description |
Table Page |
Select the Target Page e.g "List" to get an updated list after inserting record. |
Step 10: "Reload Update Data" action is applied on the "Success" event. User can click on the "+" Button on the right of the "Success" event to view the actions applied.
Adding Navigation From "List Page" to "Insert Page".
Step 1: Click on File ->New. Click on "List" page title.
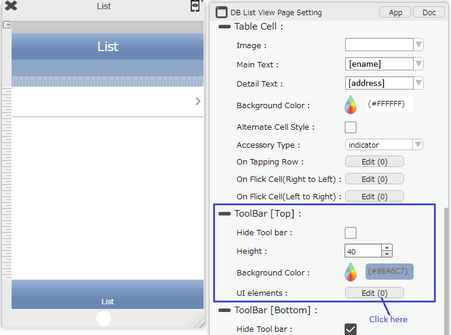
Step 2: "List" page opens. Unhide the Toolbar to add an "Insert" button in the Toolbar. Click on edit(0) button corresponding to UI elements.
Step 3: Drag and Drop Round Button to the Toolbar section. Set Display text as "Insert". Click on edit(0) corresponding to "On tap" function to add action on the "Insert" Button.
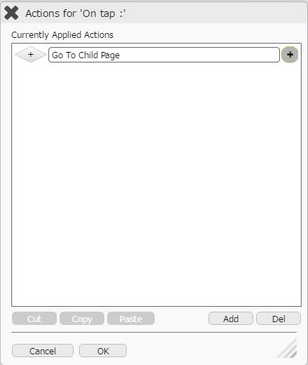
Step 4: Select Action Category as "Page Transitions" and select action as "Go To Child Page".
Enter Action Parameters:
Parameter |
Description |
Page Name |
Select Page name as "Insert". |

Step 5: "Go to Child Page" action is applied.
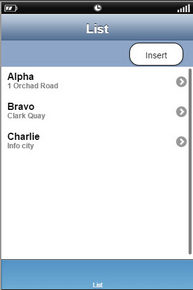
Preview:
1) Click on Insert Button on toolbar.
2) Insert page opens.
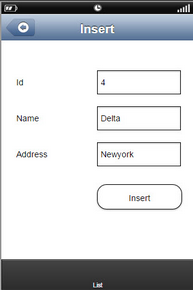
3) Enter new data.
4) Click on Insert.
5) Page navigates to previous List Page. Newly added data is shown on the List Page.