Remote Dataset Page |
  
|
Remote Dataset Page |
|
The Dataset Page is used to display data from the database.
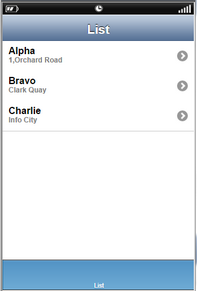
1) DB List View Page will be used to fetch and display the database table information in the form of list.
2) DB Record View Page will be used to display all or selected fields of the table corresponding to each list item from the DB List View Page.
1)Create DB List View Page
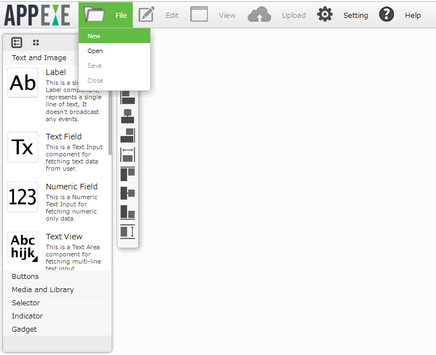
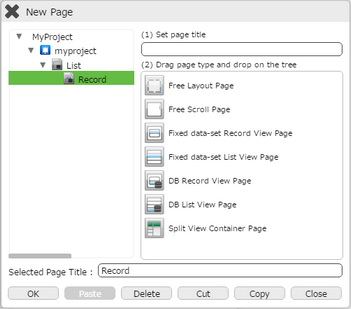
Step 1: Click on New from the menu to create a new Page.
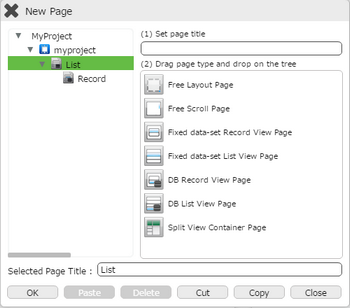
Step 2: Enter name of the page in "Set Page Title" section and select the DB List View page.
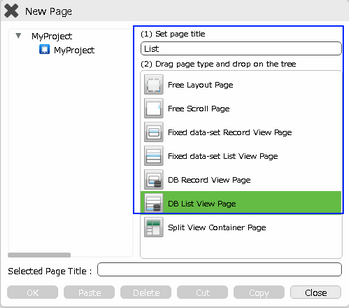
Step 3: Drag and drop it on the "App Title Folder" onto the tree and click OK to open the page.
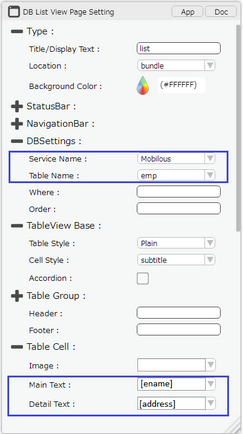
Step 4: DB List View Page Editor and its Page Properties window opens up on the right. User need to set the DB Settings and Table cell properties.
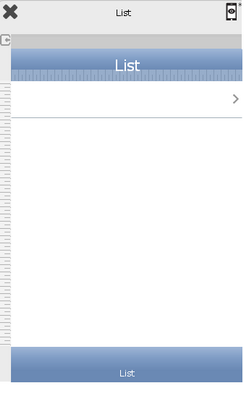
Step 5: Preview the Page.
2) Create DB Record View Page
Step 1: Click on "New" from the menu to create a new Page.
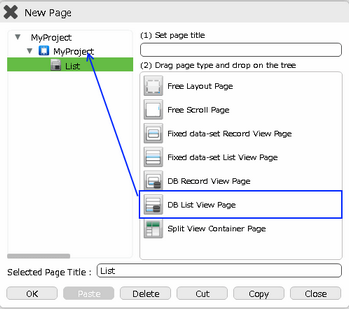
Step 2: Enter Page Title "Record" in "Set Page title" box, Select DB Record View Page.
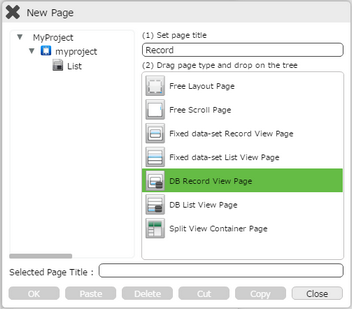
Step 3: Drag and Drop the Page on the "List" Page on the left side of the window.
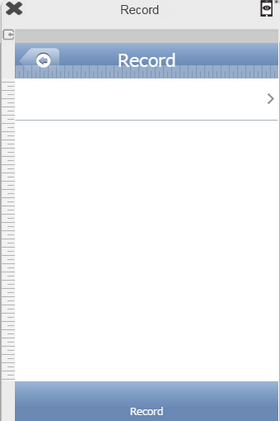
Step 4: DB Record View Page Editor and its Page Properties window opens up on the right.
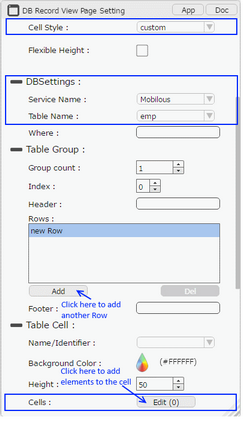
1)Select "Cell Style" as "Custom".
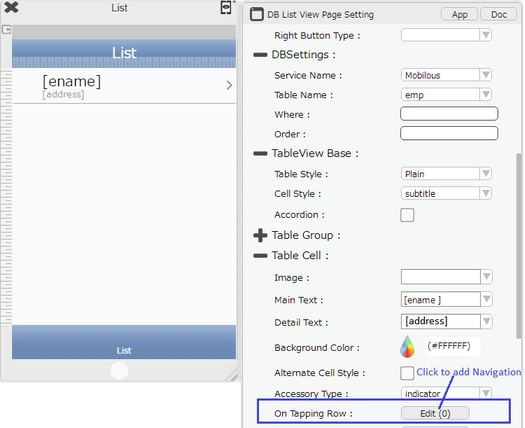
2)Select "Service Name" as "Mobilous" and "Table Name" as "emp".
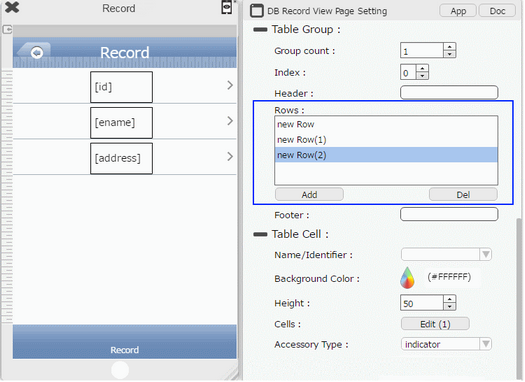
3)Select Row in the "Table Group".
4)Click on Edit(0) Button corresponding to the Cell as shown in the Image.
Step 5: Drag and Drop TextField UI Part in the new Row edit area. Select the "Fieldname" to be displayed from the Dropdown as shown in the Image.
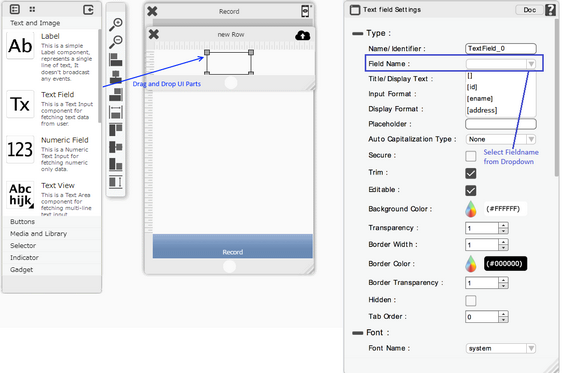
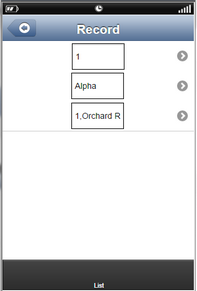
Step 6: Three rows are added by clicking on "Add" from the Properties Palette window. TextField is added to each row, by clicking on corresponding Edit(0) Button. Select Field names for each Textfield from the Properties Palette window to display id, name, and address as shown in the image.
3) Add Navigation
Step 1: Click on "List" Page on the New Page Window. Click "OK" to open the Page.
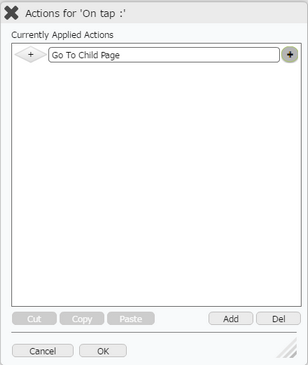
Step 2: Click on Edit(0) Button Corresponding to "On Tapping Row".
Step 3: Click on "Add" to add Navigation action. Select "Page Transitions" Actions Category and Click on "Go to Child Page" Action. Select Page Name to which the page has to be transited and select "Transfer Data". Click Apply.
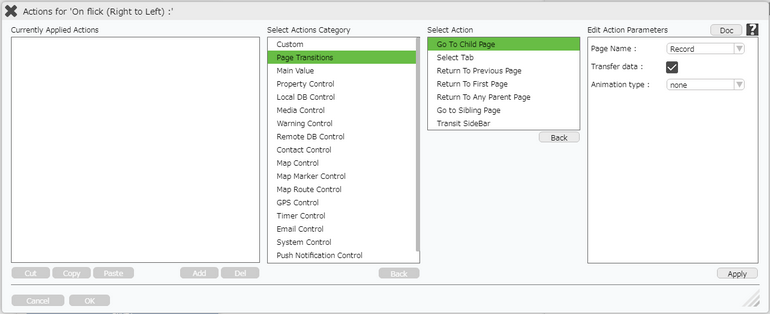
Step 3: Action set is shown in the Actions window. Click on Apply to apply the action.
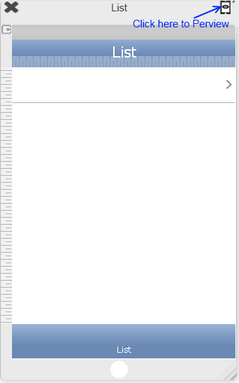
Step 4: To Preview the Page. Click on top right corner of the Page. Preview pop up opens. Click on Preview as shown in the Image.

Step 5: Observe the Preview Page. As we Click on the Row on the List View Page, Record View Page opens displaying the details of the item of the Row selected.